NAVIGATION
Overview
The 3D View of a project is launched from the application module toolbar in Proteus. As an example, we will load the simple DBELL project from the Open Samples button on the Proteus 8 home page.
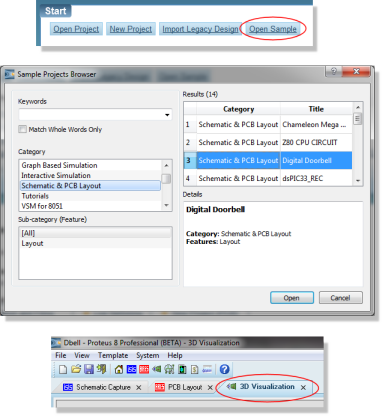
When we invoke the 3D Viewer we should then see something like the following.
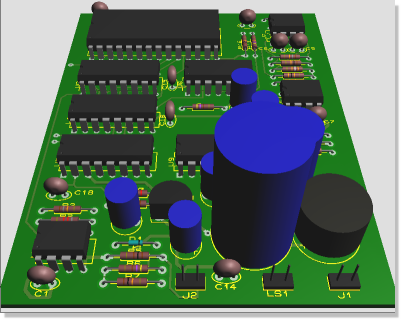
If you are working on two monitors or have a lot of screen space you can drag and drop the 3D tab to split it off into a separate frame. This enables a side-by-side view with the 2D Layout and the 3D view will automatically update as you make changes to the design in ARES.
Navigation is something more easily understood by experimentation and we therefore recommend therefore that you follow the steps above and then work through the techniques described below on the 3D View of the board.
Basic Navigation
There is an inherent limitation in making navigation intuitive in 3 Dimensions, given that a mouse can move in only 2 Dimensions. We have therefore concentrated our efforts in making ‘typical’ navigation simple for the user as follows.
Using Preset Views
Eight different preset views of the board are supplied:
Flip Board

- Top View

- Front View

- Back View

- Left View

- Right View

- Height Bounds

- Bareboard View

These views can be accessed via any of the following methods:
- Menu options on the View menu in the 3D Viewer
- From the navigation toolbar at the bottom of the 3D Viewer
- From keyboard shortcuts F8 through F12 whilst in the 3D Viewer
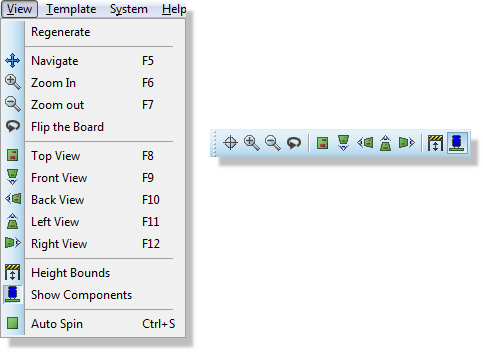
Preset View settings
Using these techniques will provide you with a set of preset views of the board – in this case perhaps the most sensible being the left view as shown below:
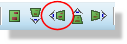
Left view icon
Finally, you can set the board to automatically rotate via the Auto Spin command on the View Menu in the 3D Viewer.
The arrow keys on the keyboard can be used to ‘nudge’ or fine tune the position of the board for viewing.
Zooming In and Out
It is highly likely that we would want to examine the board more closely. Fortunately, this is as simple as rolling the middle mouse button forwards and backwards to zoom in and out respectively.
If you don’t have a middle mouse button you can also zoom in and out using any of the following techniques:
- Menu options on the View menu
- From the icons on the Navigation Menu
- From keyboard shortcuts F6 (zoom in) and F7 (zoom out)
A good way to think of the current view is as though you were looking through a camera lens. Zooming in therefore equates to moving the camera nearer to the board and zooming out equates to moving the camera away from the board. Note that, as it stands, the camera is not moving across the board – simply forwards and backwards around the center of the board.
You can adjust the angle of the camera lens (between 30 degrees and 60 degrees) via the Camera command on the Settings menu in the 3D Viewer. In the vast majority of cases however, the default value is probably optimum.
Flying Over the Board
While the previously discussed techniques are useful in themselves the real benefit of the 3D Viewer is in allowing you to examine areas of the board that are of interest – essentially to navigate around the current view of the board.
To navigate around the current view:
- Point the mouse at the center of the board.
- Left click the mouse once – the mouse cursor will change to a ‘bombsight’.
- Move the mouse around the board, rolling the middle mouse button to zoom in or out of areas of interest.
- Right click the mouse to exit ‘fly-by’ mode when you are finished.
For example, moving the mouse towards the resistor bank at the top left of the current view and then rolling the mouse wheel allows us to zoom in and examine that area of the board in some detail.
Remember that you can quickly return to a preset view of the board via the shortcut keys or any of the methods described previously.
It is important to realize that what we are doing here is moving around the current view, rather than changing the view itself. In the camera lens analogy mentioned previously we are moving the camera around the board (and indeed, forwards and backwards when zooming) but we are not moving the board itself.
Advanced Navigation
Until this point we have (quite successfully) navigated the board within the preset views. However, it may be necessary to create a custom view of the board in order to better view a particular area of circuitry. We can do this by orbiting the board as follows:
To orbit the board:
- Point the mouse in the centre of the board.
- Left depress the mouse. Moving the mouse up and down will adjust the pitch and moving the mouse left and right will adjust the yaw (direction).
- Release the mouse when the desired view has been reached – you can then move the camera position on the current view by moving the mouse and adjusting zoom settings.
- Right clicking the mouse will exit the ‘flyby’ mode.
Using the left depress to spin the board together with the flyby mode allows you to view the board from any angle and position. It is, however, a technique that is somewhat harder to master (at least for non-gamers!). If you get into trouble you can reset the board to one of the preset views via the keyboard shortcuts F8 through F12.