CONFIGURING RASPBERRY PI
Introduction
Unlike the Arduino, the Raspberry Pi needs to be configured to work with Proteus before it can be programmed. This is normally a one time configuration but can be quite involved. There are three main stages:
1) Prepare the SD Card.
2) Find the Raspberry Pi.
3) Configure the Raspberry Pi for use with Proteus.
Preparing the SD Card
Before you start with your Raspberry Pi you will need a copy of Raspbian installed on an SD card. If you don’t know how to do this there is a link below which will walk you through it.
https://www.raspberrypi.org/downloads/raspbian/

Download Raspbian onto an SD Card.
Proteus will work with both Raspbian and Raspbian Light depending on your preference however Raspbian Light will boot up much faster.
Copying Files
Now that you have Raspbian on an SD card you’ll need to open it on your main computer. Don’t plug the SD card into the Raspberry Pi yet. Instead, remove it and re-insert it into your computer. Once you open the SD card in your computer you should see a list of files like this.

SD Card Files on your computer (*Not* the Raspberry Pi)
Now collect all the files from the drivers directory of your Proteus installation:
..\VSM Studio\drivers\RaspberryPi\Configure
And insert them into the SD card. If you’re not using ethernet you will need to edit wpa_supplicant.conf which will allow you to connect to the network on bootup. Simply input the network name and password and the Raspberry Pi will connect on bootup.
Also at this stage edit the configure.sh file and provide a unique hostname for the Raspberry Pi.
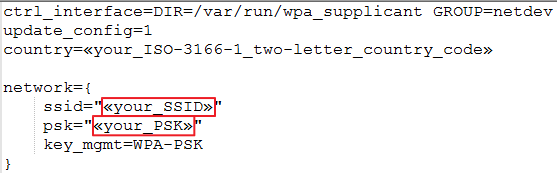
Enter wireless access details in the wpa_supplicant file.
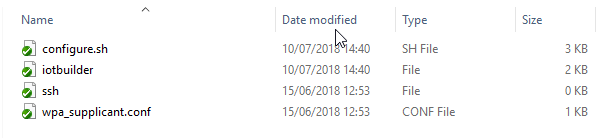
Files to be copied onto the SD Card from your computer.
Now safely eject the card from the computer.
Finding the Raspberry Pi
You will need to find the IP address of your raspberry Pi. There are numerous ways to do so, including the following.
First, installing a free port scanner. This saves time and means you don’t have to plug in your Raspberry Pi to a screen and keyboard. So visit the Advanced Port Scanner website.
https://www.advanced-port-scanner.com/
Now follow their instructions and install Advanced Port Scanner. The Download button is on their main page. Note this software is free.
Once installed power on the Raspberry Pi.Raspian light will boot faster than normal Raspian as there is no GUI to load. Then use Advanced Port Scanner to look for your Raspberry Pi.
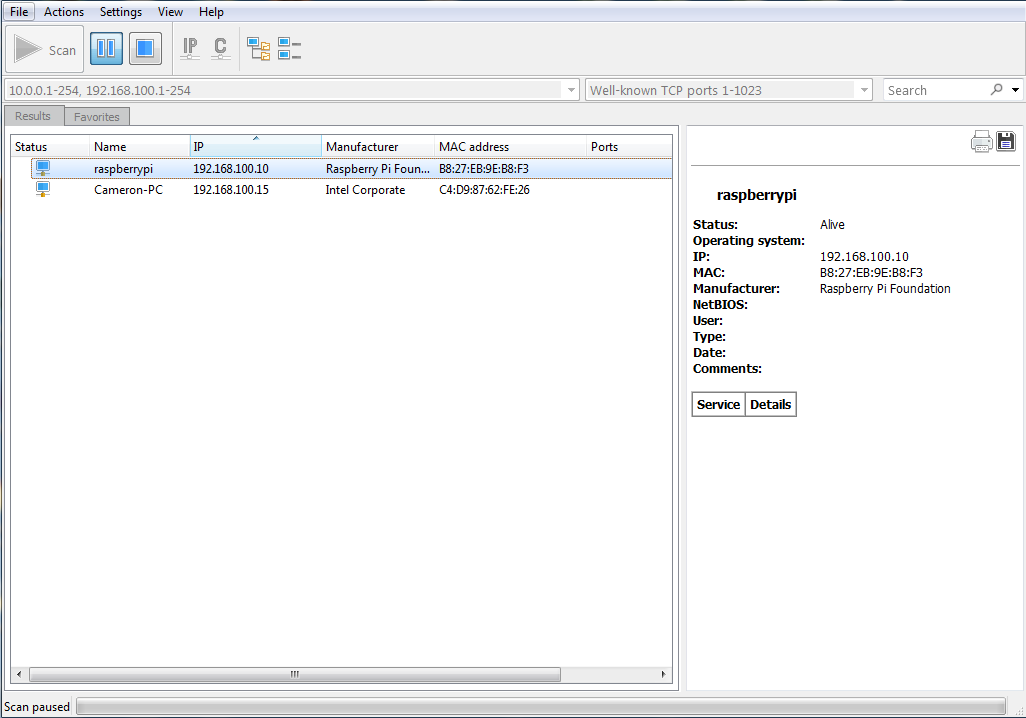
You will most likely have lots of devices on your network. You will be looking for a device with name raspberrypi and manufacturer Raspberry Pi Foundation. Find the IP which in this case is 192.168.100.10. Do not turn off the raspberry Pi.
Configuration of the Raspberry Pi
Method 1: Inside Proteus
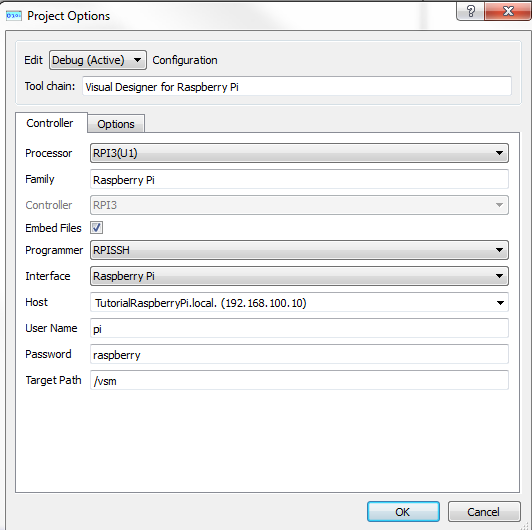
Create a blank Raspberry Pi Project in proteus and open project settings. Change Programmer from None to RPISSH and enter the IP address into the Host section.
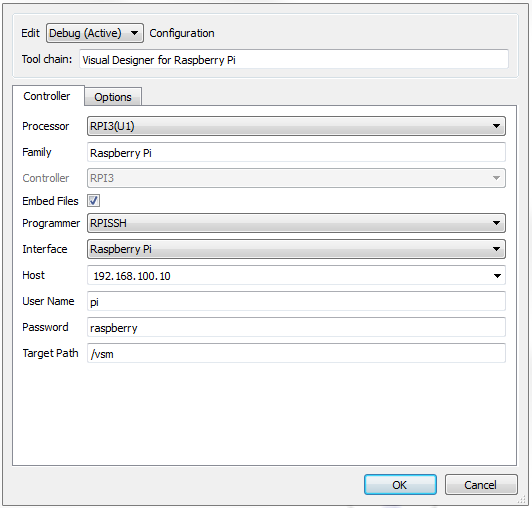
Now Upload the blank project to your Pi. A dialogue box will pop up asking for confirmation to complete the Raspberry Pi configuration, press OK to continue (Picture may be required). This section will take a while as it downloads necessary libraries and sets it’s self up
Once complete, the Raspberry Pi will reboot and connection will be lost giving Error Code: -1
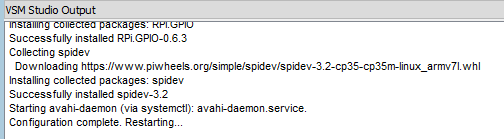
Wait a moment for the Raspberry Pi to reboot and the process is complete.
Your raspberry pi will now appear in Proteus every time you boot it up and advanced port scanner is no longer needed.
Now if you go into program settings the raspberry pi will be there with whatever name you provided in the configure.sh file.
Method 2: PuTTY
You should be able to work with PuTTY to talk to the Raspberry Pi without plugging in a keyboard, mouse and screen. If you are using Raspbian and are plugging in a keyboard and mouse you may not need this step.
This link will take you to PuTTYs main site and will talk you through the download steps.
https://www.raspberrypi.org/documentation/remote-access/ssh/windows.md
Connect PuTTY to the Raspberry Pi and write :
sudo /boot/configure.sh
This may take a while to install everything but once it has finished you will need to reboot the Raspberry Pi.
Method 3 : Keyboard and Mouse
If you are instead using keyboard and screen open the command line which is called Terminal in Raspbian. Now write:
sudo /boot/configure.sh
This may take a while to install everything but once it has finished you will need to reboot the Raspberry Pi.