SCHEMATIC ENTRY
Basic Schematic Entry
We’ll start the tutorial by familiarizing ourselves with the basics of schematic design; picking components from the libraries, placing them on the schematic and wiring them together.
The design in question is moderately large and there is therefore a reasonable amount of drawing involved. We provide a completed schematic at the end of this section, so if you feel that you have mastered the basics at any point, there is no need to continue with drawing the remainder of the circuitry. We do however urge you to read through the full contents of the documentation as we introduce important features throughout.
The first thing we need to do is to get the parts from the libraries that we need in our schematic.
Selecting Parts from the Library
You can select parts from the library in one of two ways :
- Click on the P button at the top left of the
Object Selector as shown below. You can also use the Browse Library
icon on the keyboard shortcut for this command (by default this is
the P key on the keyboard).
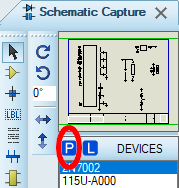
Right click the mouse on an empty area of the schematic and select Place – Component - From Libraries from the resulting context menu as shown below :
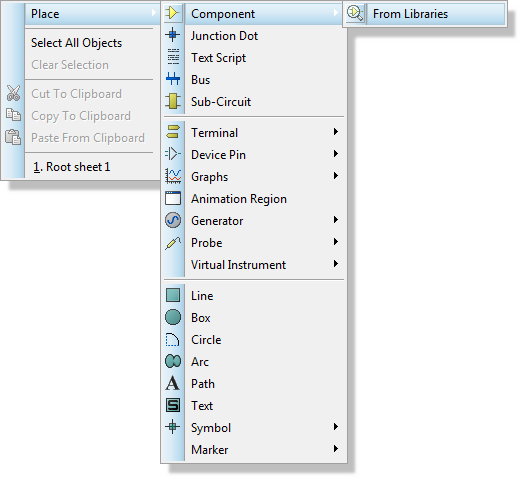
Either of these two methods will cause the Device Library Browser dialogue form to appear.
For reference, the following is a list of all the components we will need for our design:
| # | Part | Description | Is Online |
|---|---|---|---|
1 |
2N7002 |
Transistor (N-Channel MOSFET) |
No |
2 |
115U-A000 |
SIM Card Socket |
Yes |
3 |
47346-0001 |
microUSB Connector |
Yes |
4 |
73100-0115 |
SMA Antenna Connector |
Yes |
5 |
1729018 |
2-Way Terminal Block |
Yes |
6 |
A10192 |
2.4GHz SMD Antenna |
Yes |
7 |
ADJH21012 |
50A Relay |
Yes |
8 |
B3S-1002P |
Tactile Switch |
Yes |
9 |
CAP |
Capacitor (Generic) |
No |
10 |
CONN-SIL5 |
5-Way Connector |
No |
11 |
LG_R971 |
Green LED (0805) |
Yes |
12 |
LH_R974 |
Red LED (0805) |
Yes |
13 |
LSM6DSOXTR |
Accelerometer / Gyroscope |
Yes |
14 |
RES |
Resistor (Generic) |
No |
15 |
SRP3020TA-3R3M |
3.3uH, 3A Inductor |
Yes |
16 |
SS36A |
Schottky Diode |
Yes |
17 |
STM32F401CE |
STM32 Microcontroller |
No |
18 |
TLV1117LV33DCYR |
3.3V Regulator |
Yes |
19 |
TPS563231DRLR |
DC-DC Buck Converter |
Yes |
20 |
TXB0106PWR |
Voltage Level Translator |
Yes |
21 |
SIM800C |
GSM/GPRS/BT Module |
Yes |
Parts marked "Is Online" are not included in the bundled Proteus libraries and will need to be imported from an online library service. Fortunately, importing library parts from the online service is integrated right into the Pick Devices dialogue, making this process easy and streamlined! All that you need to do is register a free account when prompted (using the link provided), or enter your Username and Password if already registered. The online library has over 15 million parts (and counting) available, and over 75% of the parts in this tutorial design are imported from it!
See Also:
There are several ways in which we can search the libraries for components to be imported into the schematic. In the case of parts where you would know the part name its usually best to start the search with that. Try entering ’2N7002’ into the Keywords field on the Device Library Browser dialogue form. This gives a few components to choose from and we can then simply double click on the part in the results list to import it into the schematic. When you do this you should notice that the part now populates the Object Selector as in the following screenshot.
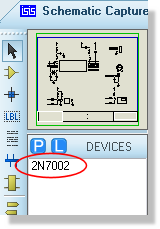
The 2N7002 in the Object Selector
If selected, then the "Show only parts with models?" checkbox will result in only parts which have simulation models already attached being included in the search results (it should be deselected for our design).
Given that we know the names of all the parts we want we could simply proceed by using this technique to bring in all the components we need. However, this may not always be the case and Proteus provides several methods for finding parts in the component libraries. One of the most intuitive is to use the library browser a little like an internet search engine, typing in descriptive keywords and then browsing the results to find a specific part. Try this now with the diodes, typing in ‘3A Schottky Diode’ in the keywords field of the library browser will result in a variety of possible diodes to select. However, if you are searching for a specific part, then using the part name (SS36A in this case) will be far more beneficial (double click on the part in the results list to import into the schematic).
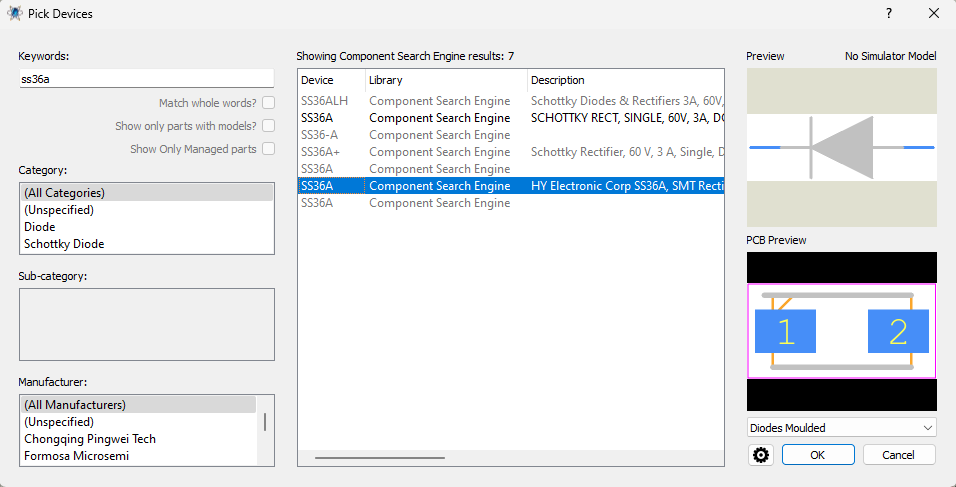
Picking a SS36A Schottky Diode from the Pick Devices form / Websearch
Note that when no search results are found in the local libraries then the online library will be searched automatically. When search results are found in the local libraries however then results from the online library (if any) will only be displayed if the button at the bottom of the dialogue is clicked.
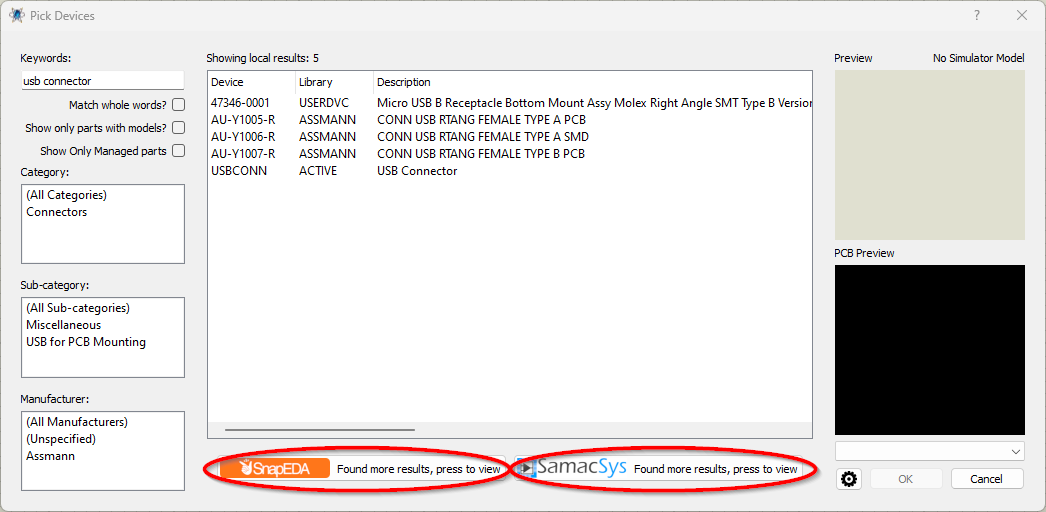
Show Websearch Results Button
You can customize the information displayed in the Library
Browser’s results list by right clicking the mouse on the results list.
The context menu provides you with options to display Categories, Sub-Categories,
Manufacturer and Library alongside each result.
For example, if you wanted to search for a specific stockcode you would
need to make sure that the stockcode column was enabled (right click on
results list) and then type something like ‘digi <stockcode>’ to
locate the digikey stockcode.
Similarly, if you want to search through only your own library parts, you
can simple enable the library field and then type something like ‘user
<partname>’; the user term will filter the results to the USERDVC
library thus reducing the search range to your own libraries.
Note that search results can be further filtered using the "Category", "Sub-category" and "Manufacturer" lists. To find the Nano SIM connector for example, type "Nano SIM" under Keywords and then select "ATTEND" as the manufacturer - then select "115U-A000" from the filtered search results list.
Whilst these exercises are a little contrived given that we are starting from a preset list of parts, the techniques described are flexible enough to allow you to locate any library part quickly. Work through the full parts list for the design (as provided above) now using one or more of these methods to find and select the parts into your design. When you are finished you should have all of the required components in the Object Selector as shown in the following screenshot.
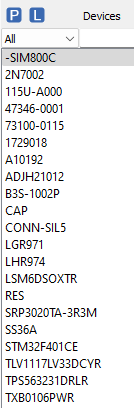
A full list of required components
Besides for the integrated online library search, which works with SamacSys (http://componentsearchengine.com), parts can also be manually downloaded and imported from popular third party vendors such as Ultra-Librarian, SnapEDA, Library Loader or PCB Library Expert. The process is discussed in detail in the reference manual and also covered in video format on the website and our Youtube channel.
Placing Objects on the Schematic
Having selected the parts we need the next thing is to actually place them on the drawing area – the Editing Window – and wire them together. You’ll notice from the screenshot that we are also splitting the contents of the schematic into logical blocks of circuitry. This is partly aesthetic but also reduces wiring clutter on the schematic and will allow us to cover the use of terminals to form connections as we work through the tutorial. The use of terminals to form connections is also necessary for multi-sheet designs, and as our design is moderately large we will need a few sheets to complete it.
The online component libraries will occasionally update their parts. Therefore, it is possible that the schematic symbols of selected parts may not look exactly the same as those shown in the sample projects and screenshots.
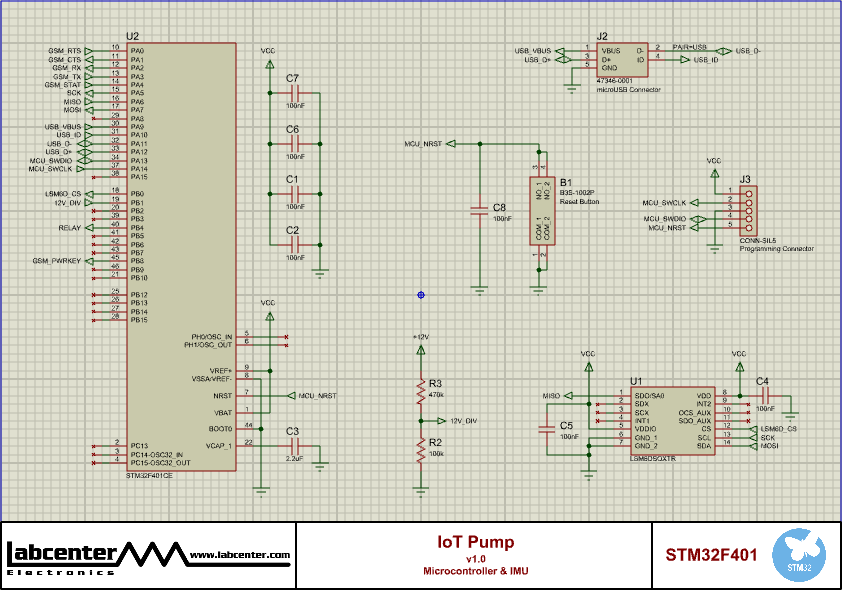
Main Sheet of the IoT Pump Schematic
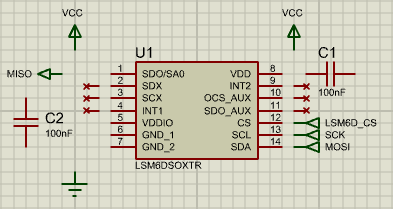
We are going to start off simply and complete the block of circuitry comprising the IMU (Inertial Measurement Unit - Accelerometer + Gyroscope) device as shown below.
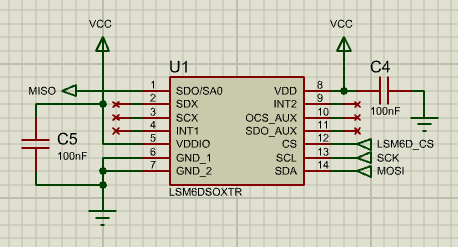
IMU circuit section
Placing Components
Begin by placing the LSM6DSOXTR IMU device as follows:
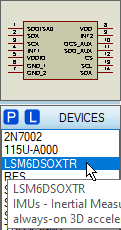
- Select the LSM6DSOXTR device from the Object Selector.
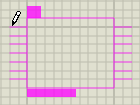
- Left click on the schematic to enter placement mode.
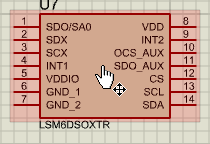
- Move the mouse to the desired location for the part, then left click the mouse again to ‘drop’ the part and commit placement.
Often we need to move parts or blocks of circuitry after placement and now is a good time to cover the different ways in which we can do that. The procedure for this should be familiar to most users; we need to select the object(s) we want to move, left depress the mouse, drag to the new location and finally release the mouse to drop.
We can select an object in several ways as detailed below:
- Choose the Selection Icon and then left click on the object. This is a standard technique found in most graphical applications and will tag any object. Bear in mind when using this technique that you must change back to component mode when, for example, you wish to perform other actions such as placing components, etc.
- Right clicking the mouse on an object will both tag the object and present a context menu containing available actions on that object.
- Draw a tagbox around the object by depressing the left mouse button and dragging the mouse to form a box encompassing the object to be selected. This method will work for any object (or indeed sets of objects). Sizing handles are provided to allow you to resize the tagbox in the event that it does not fully enclose the object. This is the technique that should be used for moving multiple, connected objects or blocks of circuitry.
We’ll get plenty of practice moving things around as we lay out the schematic; for now just use one of these techniques to move the IMU device down towards the bottom right of the Editing Window in roughly the same position as in the screenshot at the top of the section.
Having placed the IMU device, we now need to get the peripheral circuitry down and oriented correctly. We are going to need two 100nF capacitors for the VDD and VDDIO lines. Additionally, we are going to need to use terminals to achieve connectivity with power, ground and other sections of circuitry. Begin by selecting the CAP device and placing one near the top-right of the IMU device, next to the VDD line.
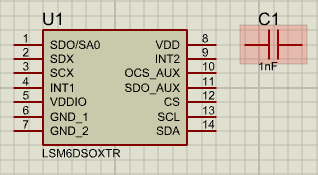
The generic CAP device has a value of 1nF by default; we will change this to 100nF in a following step. We could also choose to specifically pick a 100nF capacitor from the libraries; this can have the advantage of already having a specific part number / supplier stock code associated with the part, which could then be included in Bill of Materials (BoM) output, and also would not require us to manually change the value after placement. Note that it is also still possible to attach information such as supplier stock code to generic parts after they have been placed.
The next capacitor should be rotated by 90°. Click left once on the anti-clockwise Rotation icon (shown below); note that the preview of the capacitor in the Overview Window shows it rotated through 90°.
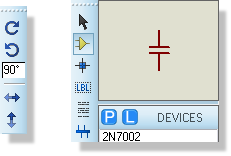
Using the Rotation Icons with the Overview window
Now place the capacitor to the left of the IMU device in the same way as before.
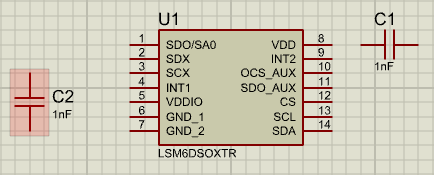
You can also rotate parts 'live' when in placement mode. Left click the mouse once to enter placement mode (at this point you will see the component outline following the mouse) and then use the '+' and '-' keys on the numeric keypad to rotate the component as you are placing it. Left click again to commit the placement in the normal way.
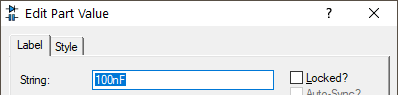
Next, let's change the values of the capacitors from 1nF to 100nF. A detailed section on editing component properties will follow; however for now just double-click on the "1nF" label (or right-click on it and select "Edit Label"), change the "1nF" text to "100nF", and click OK (repeat for the other capacitor as well).
Placing Terminals
We use terminals in schematic design simply to terminate a wire and assign a connection. Often this connection is to either power or ground but it can just as easily be to another wire elsewhere on the circuit. Terminals allow us both to vastly reduce actual wiring (avoiding spaghetti schematics) and to make connections between different sheets on the schematic. To place terminals, start by selecting the terminal mode; this will switch the Object Selector and provide us with a listing of the available terminal types.
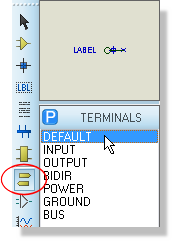
Selecting the Default Terminal
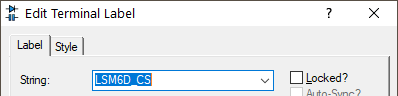
We need two power terminals, a ground terminal, input and output terminals for the SPI communication lines, and also NC ("Not Connected") terminals for the unused pins. From this stage; placement, orientation and label editing are identical to any other object and should now be becoming quite familiar. Place the appropriate terminals in their approximate locations, such that the area around the IMU device now looks something like the following. The terminal labels can be edited by double-clicking on the terminal, or by right-clicking on it and then selecting "Edit Properties". A detailed section on terminal labels will follow shortly.
Edit terminal label
Components and terminals positioned correctly
The various types of IO terminals - input, output, bidirectional - can be used by the Electrical Rule Checker (to make sure that two input terminals are not wired together, for example), and also help to clarify the design visually. The "DEFAULT" terminal type is a more generic one which can be used if ERC / visual clarification are not needed. The NC pins can be used to both clarify the design visually and also to ensure that unused pins do not show up in the Single Pin Net report.
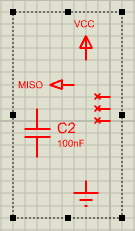
Unless you are fairly skillful, you are unlikely to have got all the components oriented and positioned entirely to your satisfaction at the first attempt, so now is a good time to practice moving things around as discussed earlier. In particular note that you can drag a tagbox around a group of objects to move the lot in one go.
Dragging components
Similarly, you can clear a selection (or group of selections) either by left clicking in empty space or by right clicking in empty space and choosing the Clear Selection option from the resulting context menu
Remember that you can rotate while moving by using the '+' and '-' keys on the numeric keypad.
Wiring Up
Having placed all the requisite components we now need to wire them together. There are three main techniques used to help make wiring a circuit as simple and quick as possible:
Modeless Wiring
There is no 'wiring mode' in the schematic editor - wires can be placed and edited at any time, without the hassle of entering a dedicated wiring mode prior to placement. This means less mouse travel, less mode switching and quicker development.
Follow-Me Wire Autorouting
After starting to place a wire, the proposed route of the wire will follow the movement of the mouse orthogonally to the termination point of the wire.
Live Cursor Display
The cursor will change as a visual indicator when wiring to show when a wire can be placed, when a wire can be terminated and when a wire is being placed.
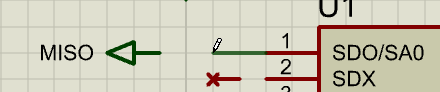
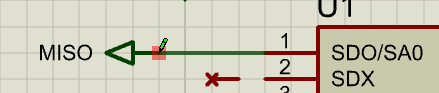
The basic procedure for placing a wire between two pins is given below, using the connection between the SDO/SA0 pin of the memory device and the MISO terminal as an example:
- Move the mouse over the SDO/SA0 pin on the memory device - the cursor will change to a green pen.
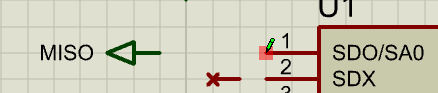
- Left click the mouse and then move it to the left until it is over the pin of the MISO terminal. The wire will follow the mouse and the cursor / pen is white during wiring
- Left click the mouse again to commit the connection and place the wire.
Junction Dots
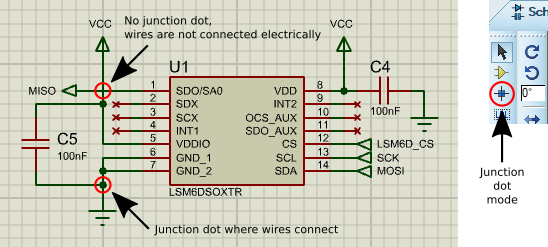
When you need to make a connection to a wire (as opposed to a pin) then the procedure is almost identical but there are a few points to note:
- You cannot generally directly start a connection from an arbitrary point on a wire; in our example you want to start the connections from the pin and terminate them on the wire. The exception to this rule is when certain modes are selected, such as component mode or terminal mode.
- When you terminate the connection on another wire then a junction dot will be placed automatically in order to complete the connection.
- Junction dots can also be manually placed using the dedicated junction dot mode.
- Whilst routing a wire, double-clicking will terminate the route with a junction dot at the current location.
Junction Dots
If, during a design, you want to make a wire-to-wire connection then it is generally necessary to first place a junction dot on the wire and then wire from the junction dot to the other wire.
If you want to adjust a wire after placement then simply right click on the segment you want to move and then either select the ‘Drag Wire’ context menu option or simply depress the left mouse button and drag to the new location.
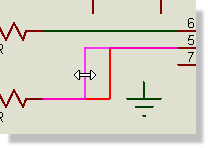
Dragging a wire
Armed with the above you should now be able to connect up all of the circuitry, completing the IMU circuit section.
Remember, Proteus provides visual indicators to help you. If the cursor turns green you can start/stop wire placement.
See Also:
Connectivity by Touch
The following basic rules of thumb may be helpful:
- If you are placing a component then you can attach its pins to another component, wire or terminal directly, by placing the pins so that they "touch".
- If you are dragging a component then you can attach to another component pin, junction dot or terminal.
- If you are copy and pasting then you can only attach to a pin end, a bus pin, a junction dot or a terminal.
Further information can be found here: Connectivity by Touch (Reference manual)
Terminal Connections
In a previous step we have placed and labeled terminals. Terminal naming is extremely important as it denotes the connection to be made. We could name the terminals in any fashion we liked but sensible names make the schematic more legible and easy to understand.
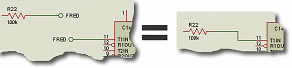
Terminal connection
Power, Ground and NC terminals are the exception to this rule, although there is no reason not to label them; an unlabeled power terminal is assigned to the VCC net and an unnamed ground terminal will be assigned to net GND. A pin connected to the NC terminal is NC and cannot then be connected on the layout.
Essentially what we are doing by labelling a terminal is making a connection to somewhere else on the schematic (a terminal with the same name) without placing a physical wire between the two objects.
Note that, where appropriate you should always prefix numerical terminal values in terminal names with a '+' or '-'. For example, a terminal labeled 12V is ambiguous and you should therefore ensure it is labeled +12V or –12V
See Also:
Power Connections
Proteus schematic capture supports a powerful scheme for making power connections implicitly, thus vastly reducing the number of wires on the schematic. There are three main concepts involved that we will discuss in turn below. Before continuing; place an STM32F401CE device on the schematic, using the techniques already learned. The STM32F401CE component contains two hidden pins which are automatically connected to power rails (VDD and VSS).
Hidden Power Pins
Almost all relevant parts in the installed libraries have their power pins hidden (not visible on the schematic). The crucial point to remember is that in such cases is that by default the name of the pin denotes the net to which it will connect.
If you need all pins to be visible on the schematic (e.g. for auditing purposes) consider using the library import tool (Library Menu -> Import Part) to bring in the parts you need. This process is quick and easy and works with library parts supplied from all major vendors.
See Also:
Hidden Power Pins (Reference Manual)
Power Rail Configuration
The easiest way to manage power nets and connectivity is through the Power Rail Configuration dialogue form, which is invoked from the Design Menu. If we do this now we can see that we have three pre-defined power supplies, namely GND, VCC/VDD and VEE. Changing the combo box at the top we should also see that the GND and VSS nets are connected to the GND supply and that both the VCC and the VDD nets are connected to the VCC/VDD supply. It’s worth examining how this happened more closely:
- The GND net is created by connections to an unlabeled ground terminal.
- The VDD net is created by connections to the power terminal labeled VDD.
- The STM32 has two hidden power pins, VCC and GND, which are assigned to nets bearing their names.
Managing power nets and power supplies is a very important concept so we’ll experiment a little to re-inforce the point. Exit the Power Rail Configuration dialogue form, right click on the STM32 part and select Edit Properties from the resulting dialogue form. Next, click on the Hidden Pins button at the right hand side to view the hidden pins and their net assignments.
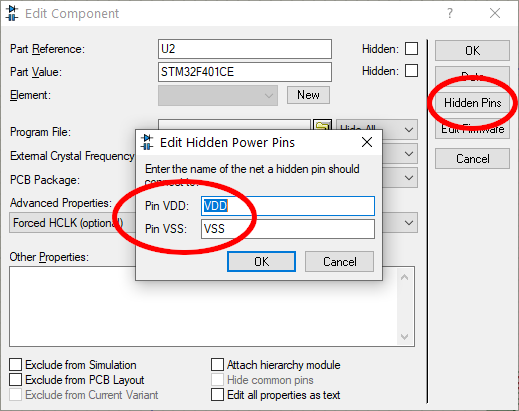
Hidded Power pins in schematic components.
Let’s change the power pin to be on net VCC, instead of the default of VDD. If we then exit the dialog and re-invoke the Power Rail Configuration dialogue and switch to the VDD/VCC power supply we should see that the VDD net is no longer present (this was the only connection on our schematic so far).
While we are here and for completeness change the Voltage of the power supply to be 3.3V, which is actually what we will be using. In PCB Design this is useful only as a reference to ourselves but actually has significance in the software for simulation purposes.
This exercise, while useful in explaining how to view/change the power nets for individual components, had no effect on design connectivity. The software is clever enough to assign both the VCC and the VDD nets to the same supply and the Power Rail Configuration dialogue allows us to configure our power connectivity at design level.
Returning to the schematic now, edit one of the VCC terminals (right click, edit properties) and change the terminal label to ‘MY_POWER_NET’. If you go back to the Power Rail Configuration dialogue you should see that this is now an unconnected power net (a power net which is not associated with a power supply).
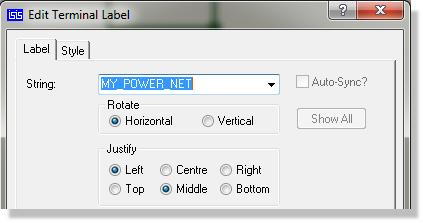
Changing the Terminal name
If we were doing this for real, we would now have to select the VCC/VDD power supply and then click the assign button to map our power net onto the correct supply.
If we had simply removed the label from the power terminal (instead of renaming it), it would have been designated to the VCC net and again everything would be done for us.
A final point worth noting is that new power supplies are created automatically when you label a terminal with a voltage. For example, labeling a power terminal +12V would create a +12V supply and assign the +12V net to the supply automatically. This means again that no action is required by the user.
In general usage therefore, the software will handle the assignments of power nets to power supplies and will create new supplies automatically. However, if you need more flexibility (for example, an analogue ground and a digital ground) then using terminal labels and the Power Rail Configuration dialogue gives you the control you need. Please see the reference manual for more information if required.
Let’s change our terminal label back to VCC for consistency before we move on.
See Also:
Power Rail Configuration (Reference Manual).
Global Power Nets
Power nets and connections are always global on a given sheet on the schematic. By default, they are also global to the design. However, if you do have a multi-sheet design and you want separate power supplies on different sheets you can isolate the supplies by un-checking the Global Power Nets box (Design Menu - Edit Design Properties dialogue form). This means that you need to explicitly wire through the sheets on the design but not within a given sheet. It is typically used only for the most complex of designs and is not relevant for the purposes of this tutorial.
Part Labels and Annotation
You should see that all the parts you have placed have a body, a unique reference / ID, and a value.
 |
 |
 |
Body |
Reference / ID |
Value |
Note that additional information can also optionally be appended to components if required (more on this shortly).
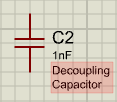
The unique part reference / ID is automatically sequentially generated by Proteus as parts are placed on the schematic, although you can re-annotate manually if you need to.
You have full control over the value, position and visibility of the part labels – you can change the values, move the position or hide information that you feel is unnecessary. A number of methods are available for changing component properties; some methods are better suited to changing a property value on a single component whilst other methods are better suited to changing a property value on multiple components at once (or in a sequence).
To change the value of a property on a single component, we could:
- Right-click on the component body, reference or value (or additional property text) and then select "Edit Properties" from the resulting context menu, in order to bring up the "Edit Component" dialogue.
- Double-click on the component body, which will also bring up the "Edit Component" dialogue.
- Right-click on the component reference or value (or additional property text) and then select "Edit Label" from the context menu, which will bring up a dialogue for editing only that property value.
- Double-click on the component reference or value (or additional property text), which will also bring up the "Edit Label" dialogue.
Methods available for changing multiple property values at once include:
The Property Assignment Tool (usually coupled with the Search & Tag tool).
The Design Explorer.
Further Reading:
The Property Assignment Tool (including Search & Tag)
Right-click on one of the capacitors and then select "Edit Properties" from the context menu, in order to bring up the "Edit Component" dialogue.
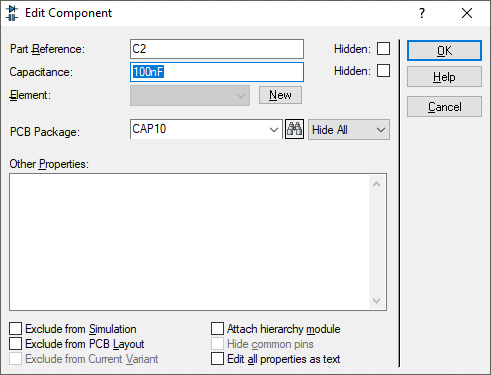
The Edit Component Dialogue
From the resulting dialogue form you can edit the part name, reference, and in this case, the capacitance (part value). The visibility options ("Hidden" / "Hide") can be useful, particularly in densely populated schematics to hide some details displayed beside the parts – the trade off being that you would then need to edit the part as above to see it’s reference and value. Additional properties and notes may also be entered in the "Other Properties" section. Note that we will change the PCB Package later when preparing for PCB layout.
Additional properties and notes which are enclosed between curly braces (e.g. "{CODE=CL21B104KBFNNNF}") will not be displayed on the schematic (will be "hidden").
At this stage it is worthwhile familiarising yourself with editing components and hiding and showing references and values.
Some caution is required when changing part references in this manner. If, for example, you change ‘C2’ to be ‘C1’ then you will have two parts with the same reference on the schematic. This will cause netlist errors when working in the PCB module. If, however, you re-annotate using the new button on the edit component then you are guaranteed a unique part reference.
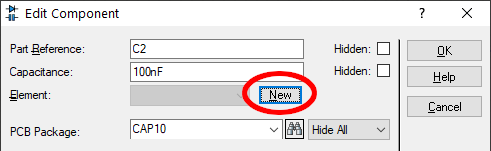
The 'New' button will automatically assign a new reference
Similarly, the Global Annotator (discussed later in the tutorial) will always avoid duplication of part references.
As well as the ability to hide part labels you can also move them to a more convenient place. This is commonly used where you might want to place a wire over the current position of the label and need to free up some screen space. We will try this now with the 'C2' and the '100nF' labels on the capacitor, moving them across to the other side of the component body.
Start by selecting the capacitor. Now point at the label 'C2' and with the left button depressed, drag it to its new position to the left of the component body. Then do the same with the '100nF’ label.
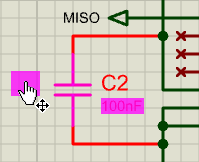
Dragging a reference
Timesaving Techniques & Block Editing
Armed with all of the basic techniques we can now look at the other blocks of circuitry on this sheet of the design, practice what we have covered so far, and introduce some new timesaving techniques. Let’s start by working on the STM32 block as shown below:
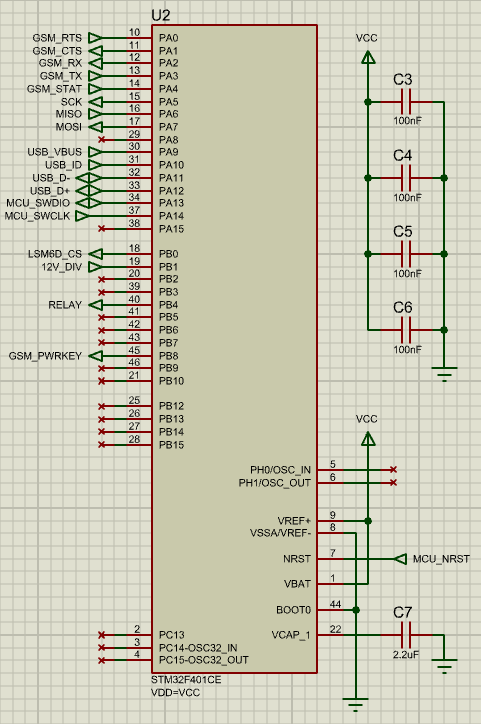
STM32 Microcontroller Circuit Section
Block Copy
Start by placing a capacitor (C3) towards the top-right of the MCU, and changing the value to be 100nF.
Next, draw a selection box around the capacitor and invoke the "Block Copy" command.
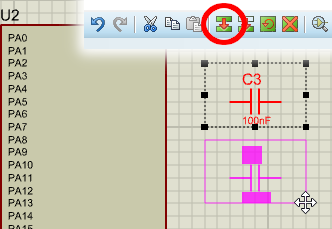
Block Copy Command
Move the mouse down and place 3 more copies of the capacitor. Complete the bank of decoupling capacitors by adding power and ground terminals, and wiring everything up. In this instance we have copied a single component, however the block copy command is generally more useful for copying circuit sections; draw a selection box around the bank of capacitors, and then invoke the block copy command again.
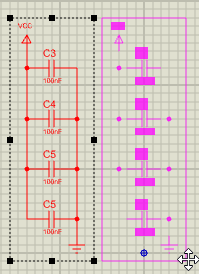
Block copy circuit section
Place a copy of the bank of capacitors to the right, and then hit the "Undo" command (or Ctrl+Z), because we do not actually need an extra bank of capacitors and only did this to illustrate the functionality of the tool (alternatively, select the copied bank of capacitors and delete them).
Wire-Repeat
Next, we will start placing and wiring up all the terminal connections for the microcontroller. Place a few terminals as shown below, and then wire the bottom NC terminal to PB15.
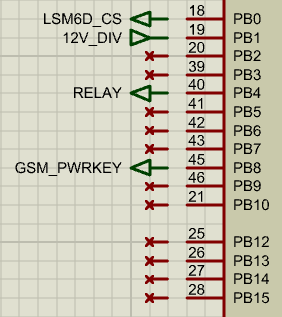
Now, instead of repeating the process for the remaining connections simply hover the mouse over the next pin up (so that the cursor turns green) and double click. This will auto-repeat the previous connection, allowing you to rapidly wire up the other lines.
Note that this technique works by placing an identical wire to the one placed directly beforehand. It follows that the destination must be exactly the same distance away (i.e. aligned) and that you must perform the operations consecutively
Terminal Name Selection
Instead of typing out the "LSM6D_CS" terminal label, we could also just select it from the dropdown (in the Edit Terminal Label dialogue) as it has been previously defined (when we drew the IMU circuit section).
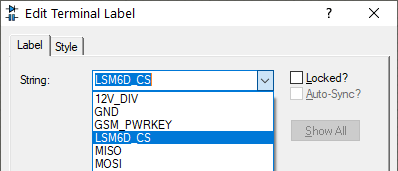
Drop down list of Terminals
Selecting of terminal names from the dropdown may actually be preferable, as it can help to avoid typing errors which could result in missing (or incorrect!) connections.
Finishing Up
All that remains to be done on this sheet now is to finish connecting terminals to the STM32 (and add a 2.2uF capacitor to the VCAP_1 pin) and add the few other small circuit sections (microUSB connector, reset button, voltage divider and programming connector).
If you feel comfortable with the topics we have covered
to date, you can skip some of the drawing and load a pre-supplied completed
schematic later in the tutorial.
You may also prefer to practice on some of the arguably more interesting
sections of circuitry, such as that of the DC-DC converter, which are
covered in the next topic.
When complete, this sheet should look something like the following:
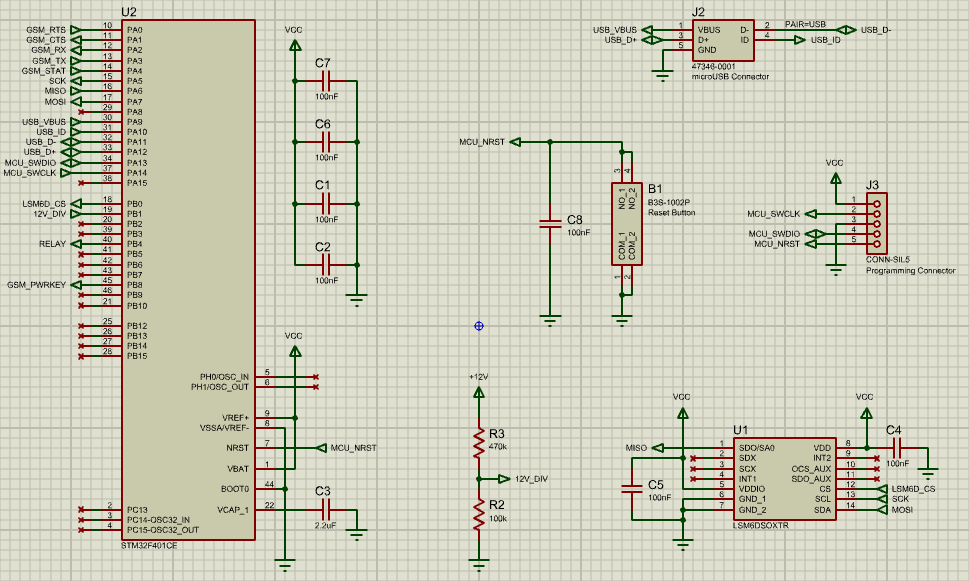
Completed main schematic sheet
It is worth re-emphazing at this point that you can re-arrange or move blocks of objects at any time by tagging a box around them and dragging them to the desired location.
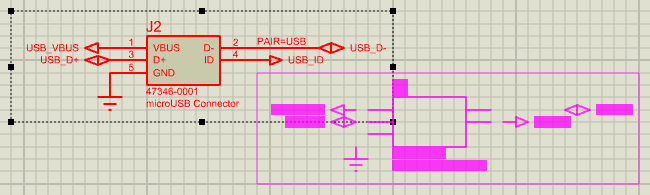
Moving a block of circuitry to the desired location