STYLES AND STYLE EDITING
Overview
Styles are the building blocks of your document. You use a different text style for different purposes when laying out a document (e.g. Heading Styles, Paragraph) and a little bit of time spent setting these up can save a good deal of hassle if their properties need to be changed at a later date. Creating additional styles also helps you think through about what you want your document to look like (e.g. a warning style or a comment style).
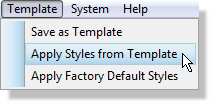
Styles are saved as part of a Project Notes template to make them available when you re-use the Template. You can also load the styles from a template at any time via the template menu.
Editing Styles
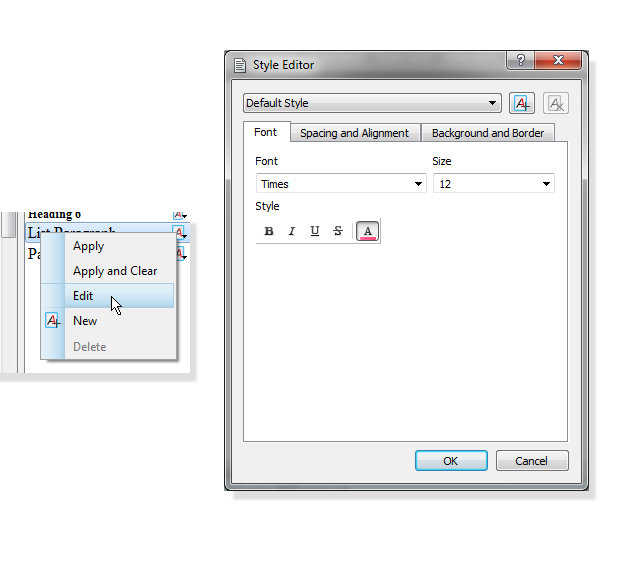
Style Management will be familiar to many users of MS Word and Project Notes works in much the same way. Start by right clicking on the style in the Style control panel and selecting edit from the resulting context menu. This will launch the Style Editor dialogue form.
The combo box at the top allows you to switch between available styles while the buttons at the right allow you to create a new style or delete a style.
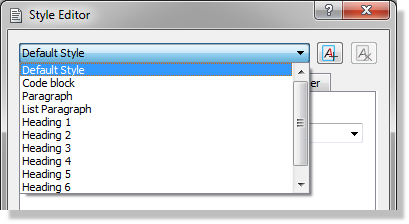
You can only delete styles you have created yourself. This option will be disabled for system styles.
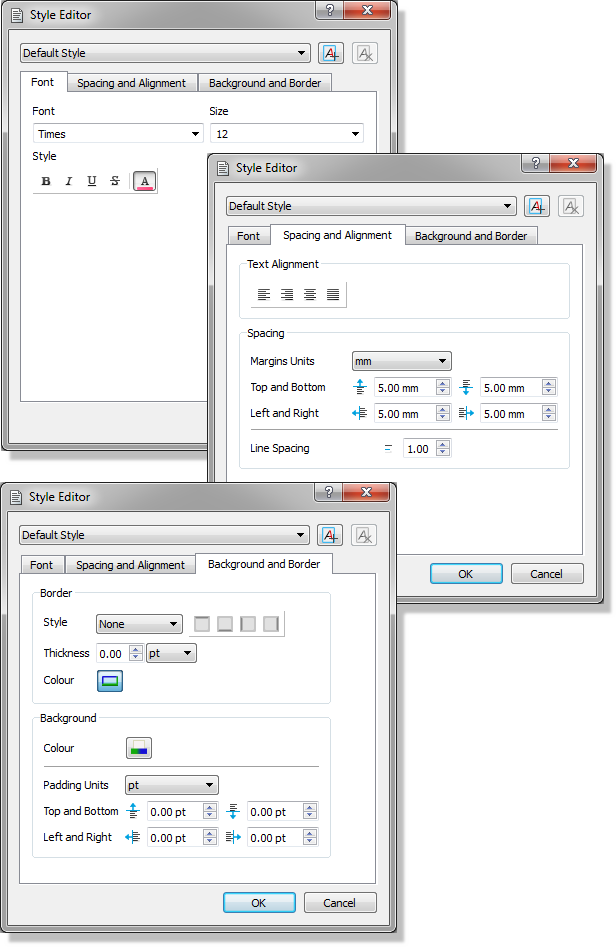
There are then three tabs representing the three main configuration types for a style:
- Font and Decoration.
- Spacing and Alignment.
- Background and Border.
Font and Decoration
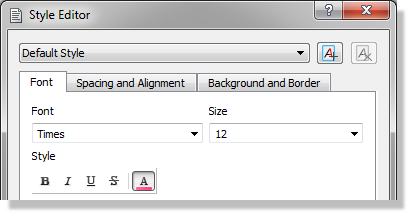
This tab allows you to set the font and size for the style along with any emphasis (decoration) such as bold, italic, underline or strikethrough. You can also set the text colour for the style here.
Using a different text colour together with a coloured background/border is useful for emphasis. For example, this text is in a created style called 'Tip' and is coloured blue; a light blue is then specified in the background/border tab.
Spacing and Alignment
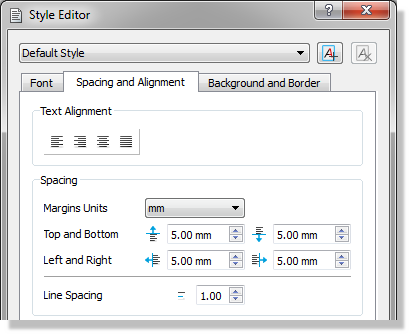
This tab contains two groupings; one for text alignment and the other for margin spacings.
The text alignment options allow you to specify justification on the page for text in the style. For example, you may want your main title - Heading1 - to be center aligned on the page.
Margin settings allow you to dictate the spacing between the paragraph ends and the start of the start of the preceding or subsequent paragraph (top/bottom) or the page ends (left/right). If you imagine your text is inside a box then the margins specify the minimum space between the box border and anything else. The top and bottom margins in particular are extremely useful as they determine the spaces between paragraphs of text in the document.
Background and Border
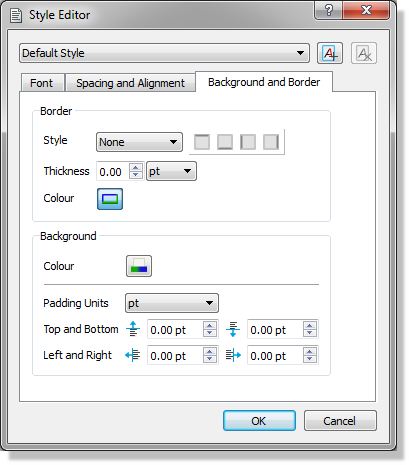
This tab lets you configure the border and the background to paragraphs typed in the current style. The padding units allow you to add a 'buffer' between the text and the surrounding border as discussed below.
Margins and Padding
These are often misunderstood or used in the wrong place. To illustrate, there are a couple of examples below. In each case, we have a red, solid border and green background colour (as set in the background and border tab above). The text is set to be white in the font page.
This is the default. There is no padding and no margins set. The text is very close to the border on all sides and the box stretches to the ends of the page.
Here is an example where we have increased the left and top padding have been increased while the right and bottom padding are left at zero. This buffers the text inside the box at the left and top. Margins are left at zero.
This is an example where we have increased the left and top margins. This buffers the box from the surrounding page, offsetting it down and to the right. Padding is left at zero.