PIN OBJECTS
Introduction
A full description of how to create and edit your own devices is given in Library Facilities. Here, we just discuss the placement and editing of pin objects. These are used to represent each drawn pin of a device element and consist of some graphics (often just a single line) plus the capacity to carry and display a pin name and a pin number.
Note that you cannot wire off a pin object. You can only connect to pins that belong to fully constituted components that have been placed in the usual way.
Placing Pin Objects
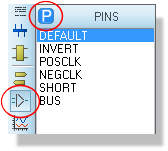
An unlimited number of pin object types may be defined, and a good selection are provided in SYSTEM.LIB. However, when you first select the Device Pin icon, a basic set of 6 types are automatically pre-loaded into the Object Selector and these will suffice for most purposes.
To place a pin:
- If the pin type you want is not listed in the Object Selector, first pick it from the symbol library.
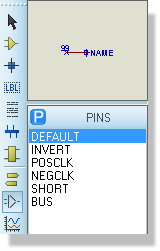
- Highlight the pin type name in the Object Selector. Proteus will show a preview of the pin in the Overview Window.
- Use the Rotation and Mirror icons to orient the pin according to how you want to place it.
- Left click the mouse on the Editing Window to enter placement mode.
- Move the mouse to the position where you want to place the pin object (a 'shadow' pin will follow the mouse in this mode).

- Left click the mouse again to commit the pin at that position and exit placement mode.

Having placed a pin, you will generally want to modify it to give it a pin name, number and electrical type. There are a variety of possibilities:
- Edit the pin label using any of the methods described in Editing an Object.
- Use the Property Assignment Tool to assign the NAME, NUM and TYPE property of one or more pins. This is especially effective if a group of pins have names which run in an alphanumeric sequence.
If a pin represents a data or address bus, you may want to use a bus pin. In this case, pin numbers can only be specified using the Visual Packaging Tool. Equally, if the device has multiple elements, (e.g. a 7400) you must again specify pin numbers for each element using the packaging tool. In either of these cases, you should leave the pin numbers of the pins blank.
Please see the section on the Visual Packaging Tool for more information about packaging considerations.
Editing Pin Objects
A pin may be edited using any of the general editing techniques (see Editing an Object). In addition, since pins often appear in groups, the Property Assignment Tool can be put to good use for defining pin names, numbers and electrical types.
See Edit Pin for the controls on the pin dialogue form.
Pin Object Properties
Pin objects have the following system properties:
| Property Name | Description |
|
NAME |
The pin name. |
|
NUM |
The pin number. |
|
SYMBOL |
The symbol used for the pin. This can be one of the standard pin symbols, or else the name of a user defined pin symbol. |
|
TYPE |
The electrical type of the pin. This can be any of PASSIVE, INPUT, OUTPUT, BIDIR, TRISTATE, PULLUP, PULLDOWN, NC or POWER. |
See Also: