Tutorial : Flashing LED's
Introduction
This tutorial starts when you open Proteus and finishes with the flashing of an LED in a Proteus simulation. The goal here is to cover the basics with the most simple of projects.
New Project Wizard
Visual Designer is integrated into the Proteus Design Suite and so we start our Visual Designer Projects from the Proteus Home Screen. The easiest and best way to create a Visual Designer Project is, unsurprisingly, through the New Project Wizard.
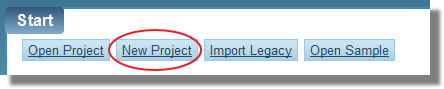
New project from the Home page of Proteus
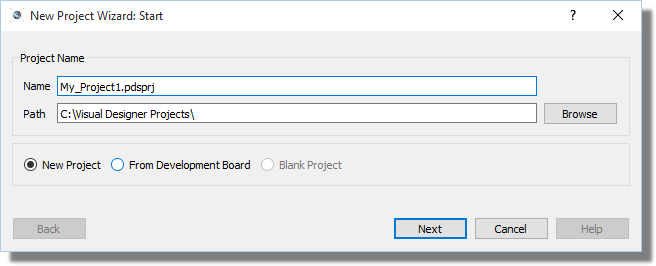
The first page allows you to select the name and destination of your project.
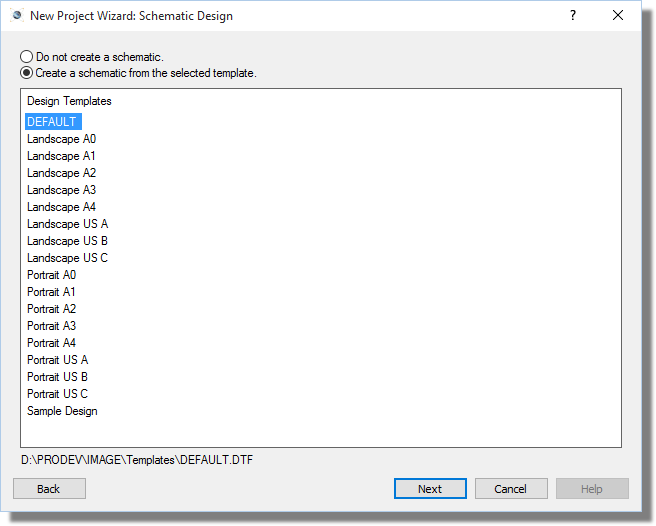
The second screen of the wizard allows us to select which size of schematic sheet we want. The default is fine for all but the largest of projects and is certainly OK for the flashing of an LED.
If your license includes Proteus PCB Design the next screen will offer you an option to create an accompanying PCB with the project. It's not necessary for our purposes and beyond the scope of this document so we'll leave the option disabled.
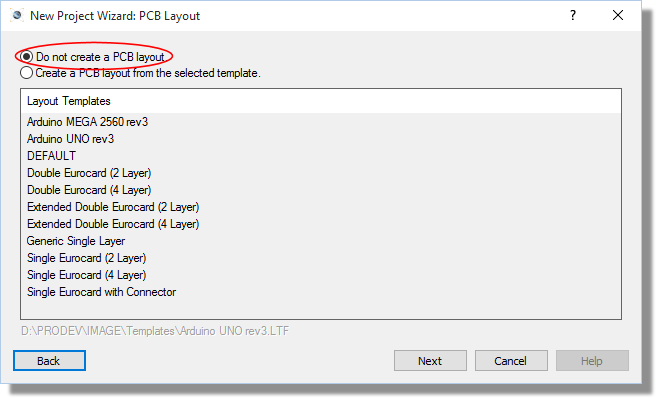
You may not see this screen at all if your license key doesn't include PCB Design.
Next up is the firmware screen and it is here that we really define our Visual Designer project. First, we change the radio buttons at the top to the option for Flowchart Project and then we select the Arduino family and either the Arduino Uno or the Arduino Mega from the controller combo box.
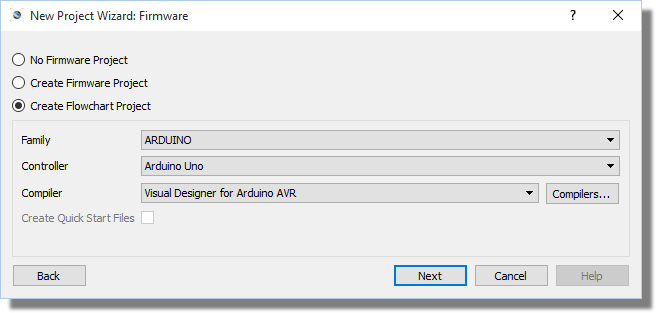
The firmware selection refers to a Proteus VSM simulation project rather than a Visual Designer flowchart project.
Finally, you will be presented with a summary page of your configuration.
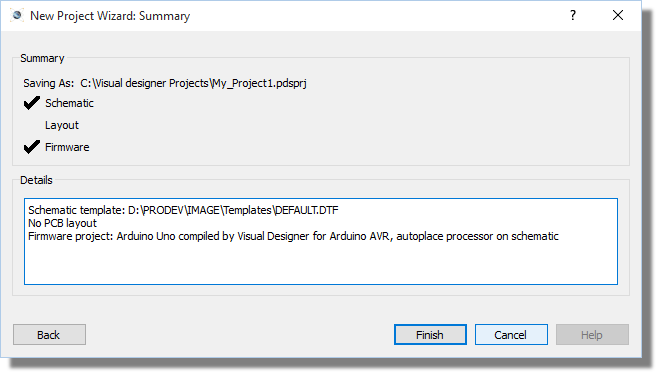
After you exit the dialogue form the project will be created and you will see both a skeleton schematic with the Arduino processor placed and a skeleton chart project with the familiar Setup and Loop routines on the Editing Window.
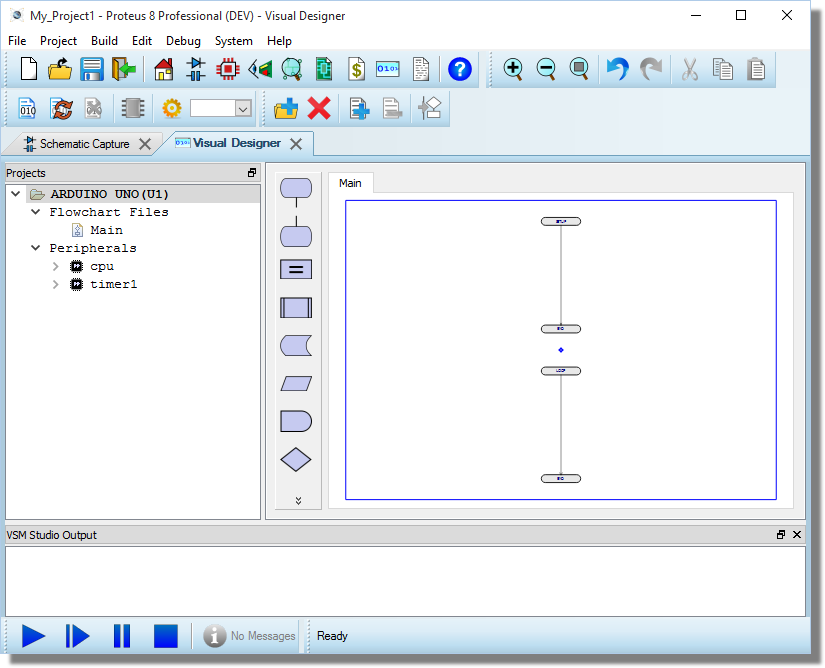
The standard Arduino Sketch includes two functions, namely Setup and Loop. The Setup function is intended for one time initialization and the Loop function provides a place for the main program loop. Visual Designer for Arduino uses the same paradigm and you must have at least one of these two constructs in your flowchart for it to compile. If you have deleted them, just add an event block and name it appropriately.
Now we are ready to start designing our project.
Adding a Peripheral
The first thing to do is to add the peripheral(s) for the project. These can be Arduino shields or just little Grove sensors. The Grove system consists of an Arduino shield with lots of 4-pin headers into which any number of sensors, buttons and LED's can be plugged. This makes it very flexible and ideal for experimenting.
We'll be adding a Grove LED. In Visual Designer, we right click on the Project Tree and select the Add Peripheral command. Next, switch to Grove and select one of the LED's.
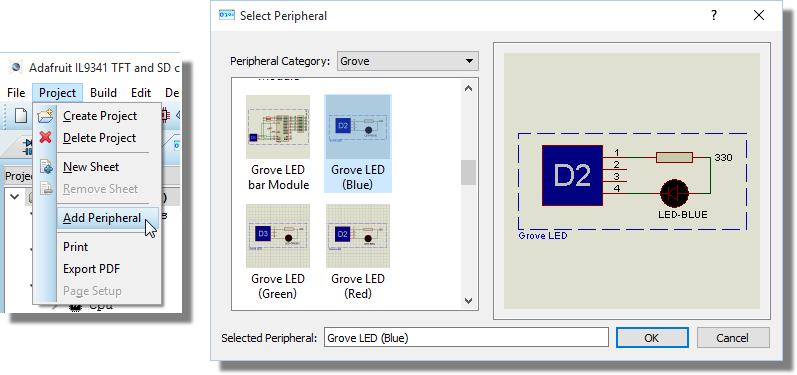
Repeat the process to add a Grove button. If you then switch to the schematic tab you will see that the 'virtual hardware' has been autoplaced for you.
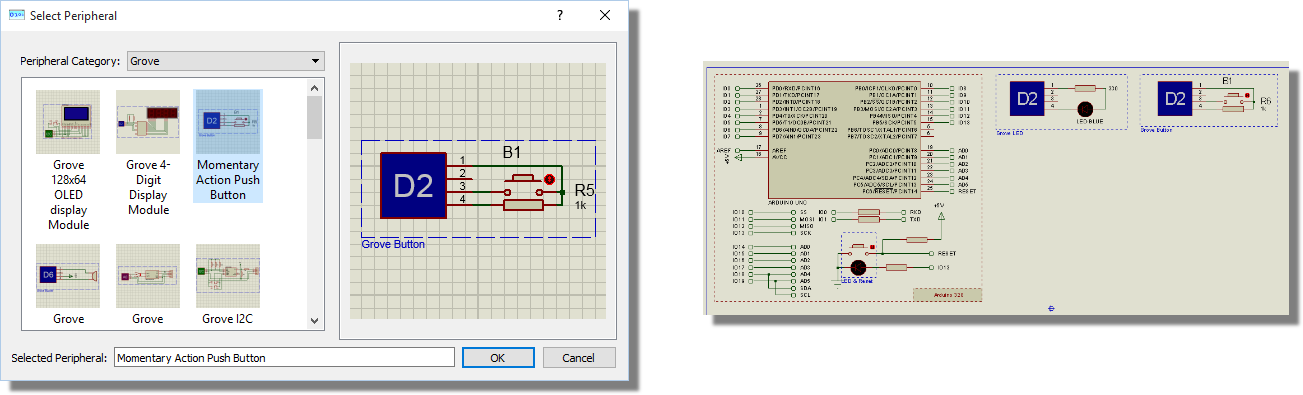
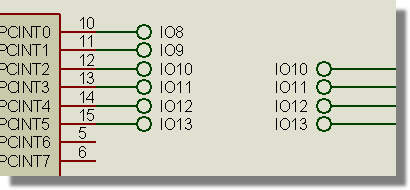
To avoid clutter on the schematic, connections are made on the schematic by giving terminals the same name. Any terminals with the same name can be thought of having an invisible wire between them
In real hardware, this equates to connecting up the Grove button and Grove LED to the shield and attaching the shield to the Arduino Uno.
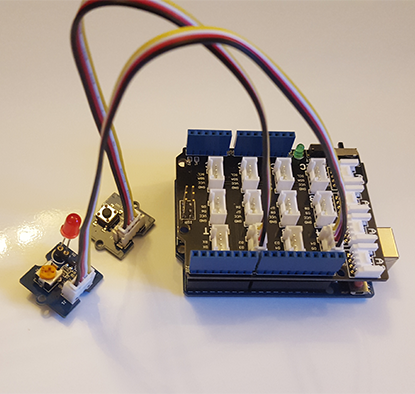
Grove LED and Grove Button connected onto the Arduino UNO.
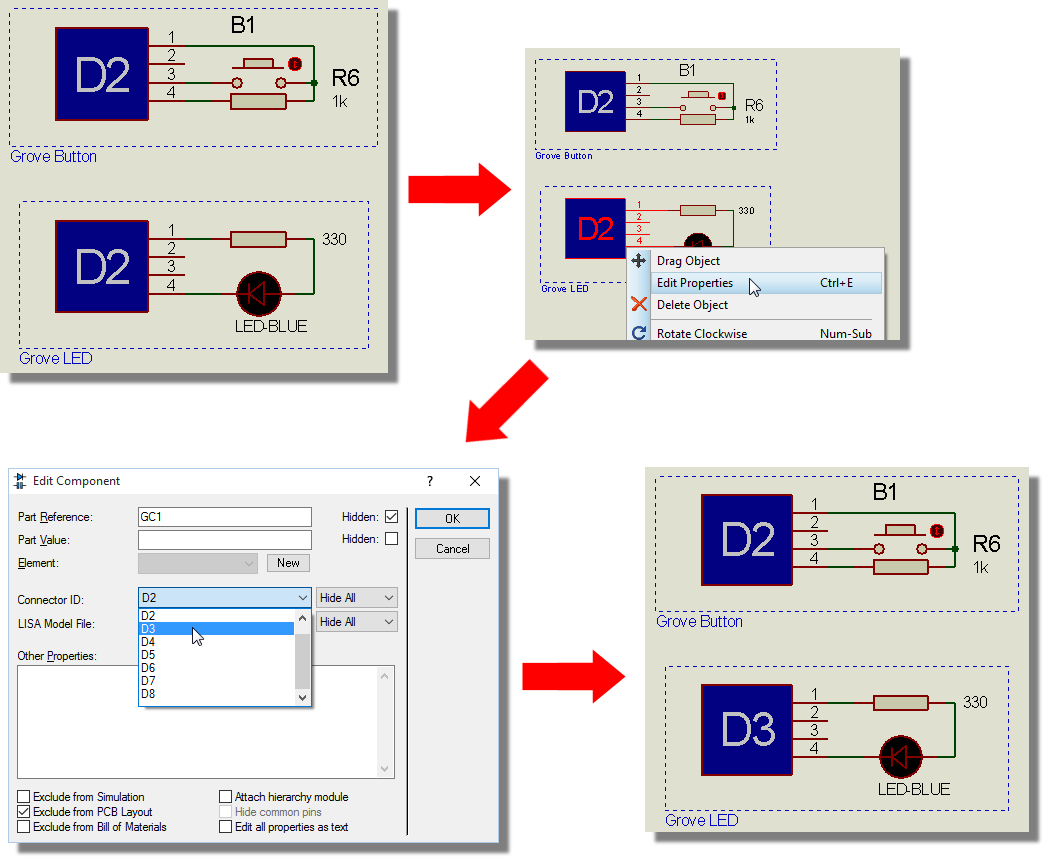
Note that you must plug the peripherals into the same connectors on the Grove shield as they are designated on the Proteus schematic. You must also ensure that you don't have two peripherals with the same connector ID on the schematic; if you do, you need to switch to the schematic and change the ConnectorID on one of the peripherals.
See Also:
Drag and Drop Flowchart Design
Back in Visual Designer, you'll notice that the Project Tree now has two entries under the peripherals section.
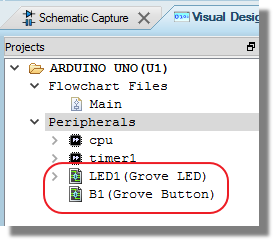
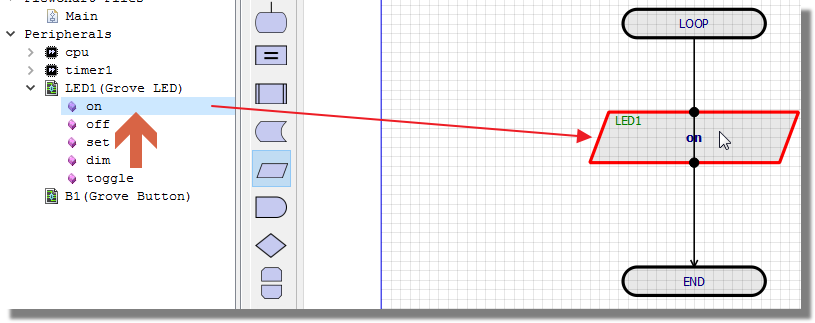
The beauty of Visual Designer is that you can expand the peripherals to find a list of methods. These methods are the primary way in which we interact with the hardware. For example, drag and drop the 'On' method of the LED into the loop routine.
See Also:
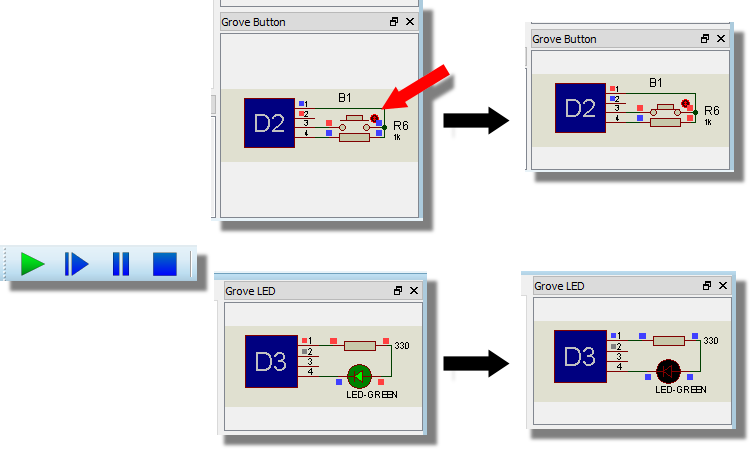
To test this simply press the play button. The program will compile, the simulator will start and the LED will turn on. You can see this either via the Active popup at the right of Visual Designer or by switching to the schematic tab.
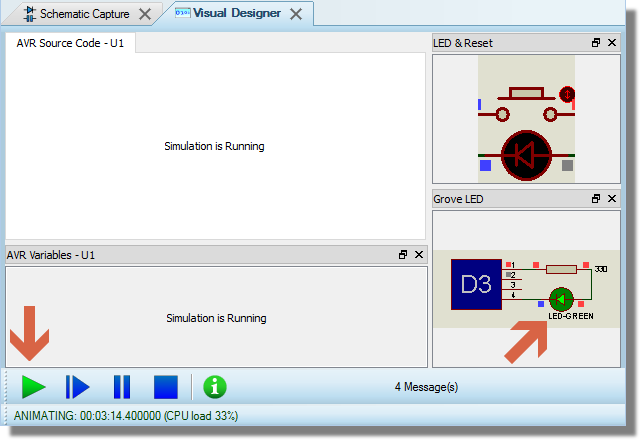
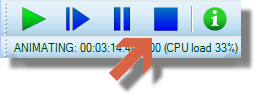
Press stop to exit the simulation and we'll extend our program to switch the LED on and off with a button press. You'll notice that the button has no methods in the project tree.
The only sensible information we need from the button is to know whether it has been pressed and for that we have what we call a 'sensor function'. A sensor function returns either TRUE or FALSE depending on whether the basic peripheral function is true or not. For example, the sensor function for a button will return TRUE when the button is pressed and FALSE if it isn't. Similarly, the sensor function for an LED will return TRUE when the LED is on and FALSE when the LED is off. Place the sensor function for the button by dragging and dropping from the button itself onto the loop function of the flowchart.
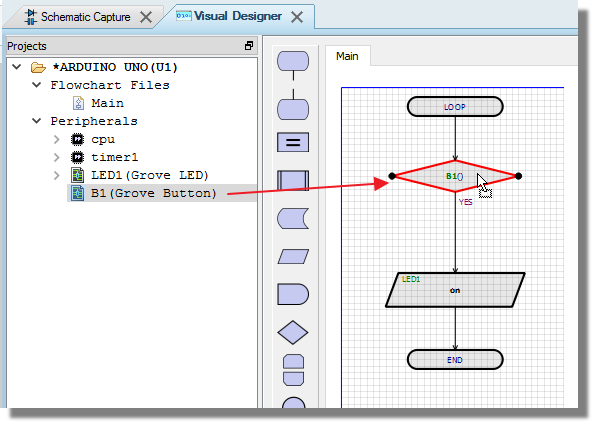
You will notice that it appears as a decision block. Sensor functions always return TRUE or FALSE and a decision block allows us to split our code into two conditional paths. Your loop routine should currently look something like the following.
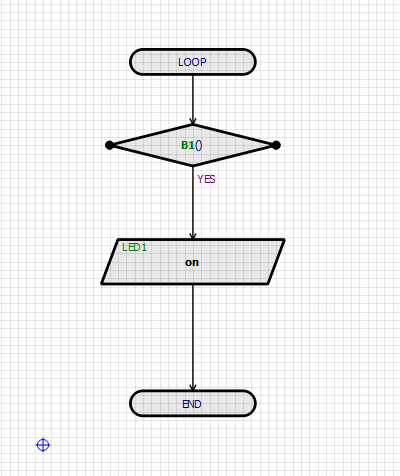
We are constantly testing the button to see if it is pressed and we are turning on the LED if it is. However, we still need to tell the program what to do if the button is not pressed. We want the LED to turn off so lets drag and drop that method into space alongside the ON operation.
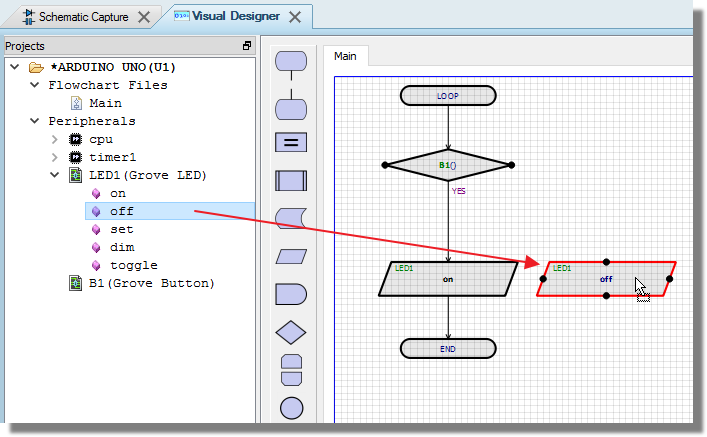
Now, we need to wire from the decision block to the top of the OFF command. To place a flowline click on an output node (the decision block), move the mouse to an available input node (top of the OFF routine) and click the mouse again.

Similarly we need to connect the flow from the bottom of the OFF command back into the main loop.

Your program should now look like the following
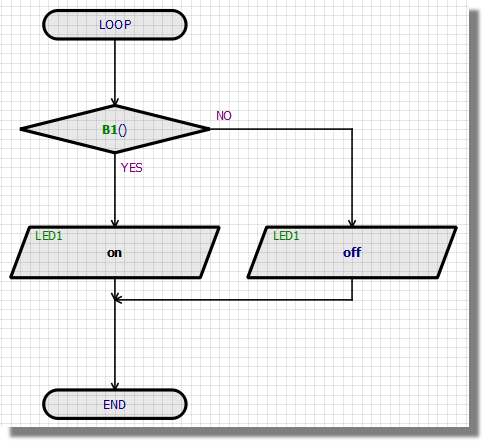
Note that the decision block has two labels indicating which code path is followed if the decision resolves to TRUE (YES) and which code path is followed if the decision resolves to FALSE (NO). If these are the wrong way around you can switch them by right clicking on the decision block and selecting the swap command from the context menu.
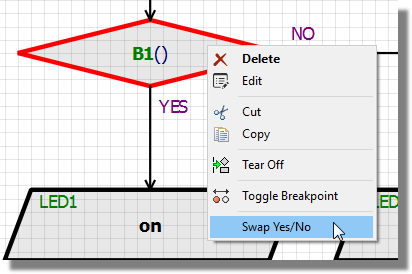
Having made this change, our program now turns the LED off when the button is down and on when the button is released. To compile and test, first press the play button and then use the mouse to press the button down.
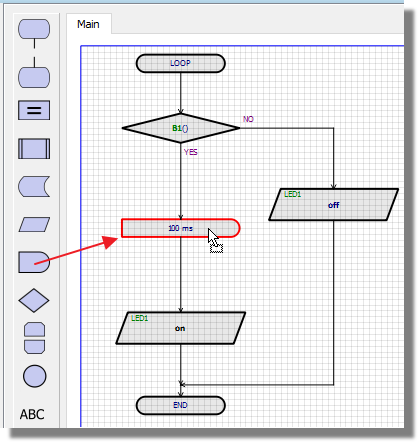
You can experiment further here with changing the decision or swapping in the toggle method. You might also find it useful to add a delay.
See Also:
The next tutorial will introduce interactive simulation and basic debugging skills.