CATEGORIES & FIELDS
BOM Categories
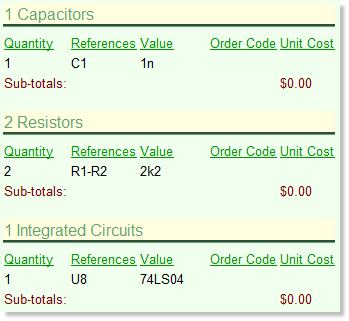
A BOM Category is basically a group of components which are designated to be of the same type. The designation is made by the reference prefix of the parts in ISIS. For example, Resistors have prefix 'R' (R1, R23, R54, etc), Capacitors have designator 'C' and so on. In the Bill of Materials each category then forms a different section of the report.
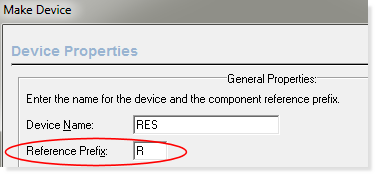
The designator is specified at the point of Make Device and can be set in the first page of the Make Device dialogue form.
It follows that you can both add new categories to the BOM report where a reference prefix already exists in the schematic and create new categories by making/re-annotating parts with a different reference prefix. This is shown in the examples below.
Adding, Editing and Ordering
To add a category to the BOM Report
- At the left hand side of the BOM module click on
the add button underneath Categories.
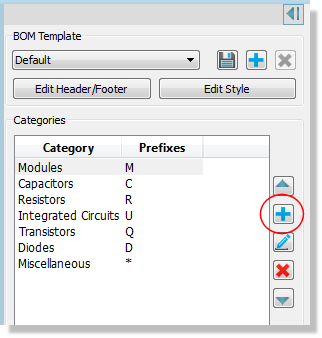
- On the resulting dialogue form enter the name for
the category and the prefix or prefixes to match. For example, a heading
of Connectors would match reference 'J'.
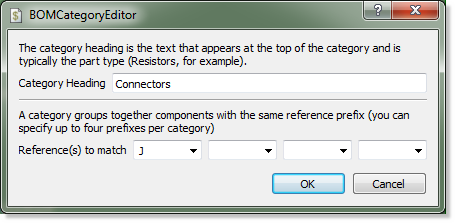
- Click OK to exit the dialogue form. The new category should appear at the bottom of the category list.
To re-order the Categories
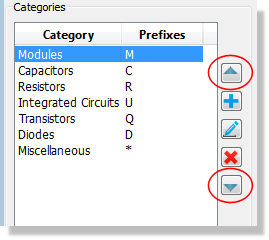
The listing of categories at the left represents the order that they will appear in the BOM report. To change this:
- Select the Category you want to move by left clicking on it in the list.
- Use the up and down arrows to re-arrange it's position in the list.
- You should see the live display change to reflect
your changes.
To suppress Categories with no components
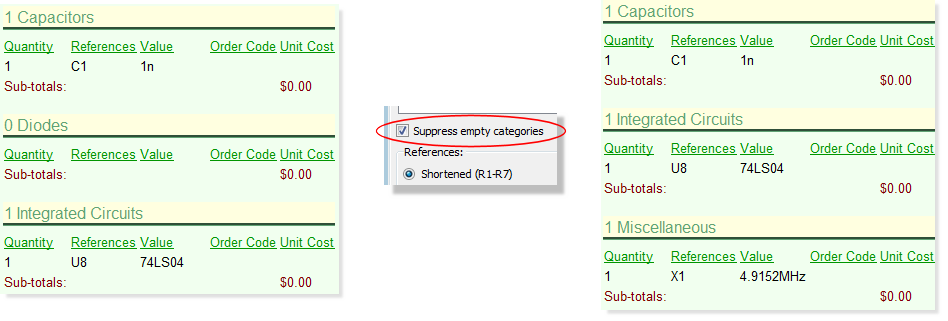
On some designs there will be categories in the BOM report which have no components on the schematic. You can suppress these by selecting the 'Suppress Empty Categories' checkbox underneath the Category editing buttons.
To delete a Category from the BOM Report
If you do not want a category to appear in the Bill of Materials report you can delete it from the listing.
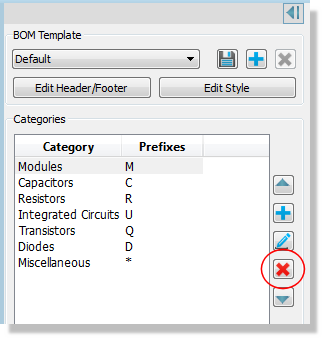
- Select the Category for deletion by left clicking on it in the list
- Use the delete button to remove the category.
- All parts associated with that category will return
to being listed in the Miscellaneous category.
The Miscellaneous Category is a required item and cannot be deleted.
BOM Fields
A BOM field is basically a column in the Bill of Materials report which is linked to a property on the schematic components. It provides the mechanism by which you add information about schematic parts to the report. The basic procedure is :
1) Add (or create) a BOM Field. This adds a column in the BOM report
which will map on to a component property in ISIS.

2) Use the Property Editor to enter data for the property based on components in the schematic.
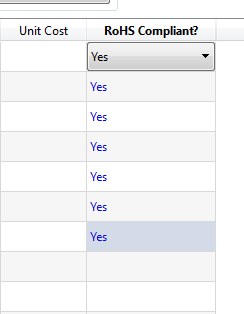
3) Assign the data back to the schematic parts, thereby updating the BOM report.
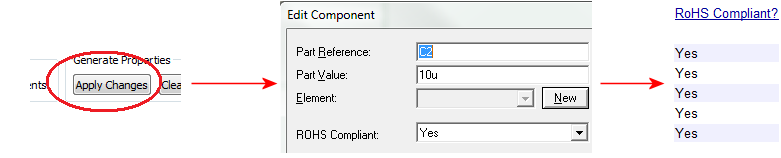
Practical examples are probably the best way to illustrate the relationship between properties and BOM fields. Several guides are provided here.
Component Placement Information
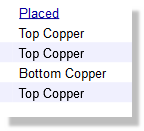
There is a special field for 'placed' which will indicate on which side of the board the component in question is located. To add this property:
1) Add a field in the normal way and select the .placed property from the resulting combo box.
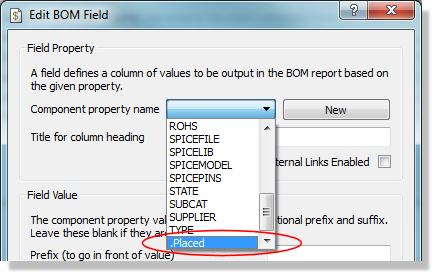
2) Placement information will be displayed in the BOM but is not editable.
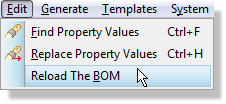
Note that a change in ARES to placement does not automatically refresh the BOM. If the BOM module is open while you are editing placement on the layout you will need to reload the BOM manually via the Edit Menu command when you are finished.
BOM Notes
BOM Notes allows you to add some free format text to the report. You can launch the notes editor from the bottom of the left hand configuration pane in the Bill of Materials module.
As with anything else in the report you can style the BOM Notes via the style editor dialogue form.
If you need to add sizeable notes or want to include a purchasing guidance document then it is better to do so in the Project Notes application module. The Project Notes content then can be appended to the PDF output of the BOM via the checkbox on the output toolbar.
