MQTT Programming Methods
Introduction
Visual Designer makes programming with MQTT simple and straightforward. However, before you can start writing programs you need to follow these three setup steps:
- Make sure your hardware has internet connectivity. If you are working with Arduino go to Add Peripheral and choose an option from the Internet of Things category (e.g. ESP8266). If you are working with Raspberry Pi this isn't necessary because internet connectivity is built in on the rPi.
- Enable the MQTT peripheral. For code saving reasons many on board peripherals are disabled by default. Right click on MQTT in the Project Tree and enable the peripheral.
- Configure the MQTT peripheral. Double click on the MQTT peripheral to open the properties box underneath. This lets us set the IP address and port of the MQTT broker (our computer in the example below) along with other access details.
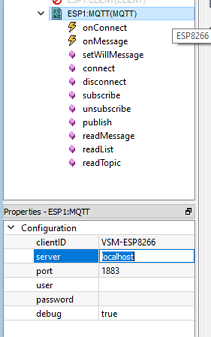
Design time configuration of the MQTT Peripheral
clientID
clientID will specify the name your device will receive. This should be unique for the broker. If you have multiple devices with the same name, every time the new device with that name connects to the broker it will kick the old device with that name off. This can cause issues like loops as the old device attempts to reconnect.
You can also set the ClientID during runtime with a method.
Server
The server will specify the location of the broker. For example, if the mosquitto broker is running on the same machine as Proteus, you can simply use localhost to connect to it, or you can use the IP address of your machine e.g. 192.168.0.1.
If the broker is running on a machine on the local network, you will need its IP address to replace localhost.
If you wish you can setup or find online brokers such as test.mosquitto.org which will allow you to use the MQTT without your own broker. These brokers are on the internet and can therefore be accessed by any network with internet, allowing your MQTT project to span multiple networks and buildings.
See Also:
Port
The default port the broker runs on is 1883, however if you wish you can change this in the broker configuration files. Most online brokers such as test.mosquitto.org use 1883 as the default port also.
User/Password
Some brokers may require you to add credentials. This is simply where you add the credentials to your project to allow them to access a secure broker. Leaving them blank will indicate you don’t wish to use them.
Debug
Setting this to true compiles in the MQTT debug statements.
On Arduino, these dump data to the Bridge Console. In simulation it comes out in the simulation log. On ESP8266/Playkit you can connect to it via telnet and on Yun there is port you can connect to to view it. On Arduino it is a compile time thing so the debug statements only use ROM space if it is enabled.
On Raspberry Pi it dumps to stdout, so if the server program is run from a command prompt you can view it that way.
Quite apart from the MQTT debug statements described here you can add debug blocks to your own program via the debug method under CPU in the project tree. These will travel out through the same channel to your hardware platform.
That's it. Now the MQTT methods are all available for use in your program and the system knows the location of the broker for communications. Each method is discussed in the topics below and you'll find practical examples of most of them in use in the MQTT Basics tutorial.
See Also:
onConnect Event Handler
The onConnect event handler is called each time a connection is established.
Library code within the MQTT peripheral will automatically re-connect if the connection to the broker is lost and so this handler may be called periodically if the connection is unstable. If a connection is made with cleansession=TRUE (the default) then all subscriptions will be lost when the connection is re-established. It is therefore normal to place subscriptions in this handler to ensure they are in place and that the application recovers from a broken connection seamlessly.
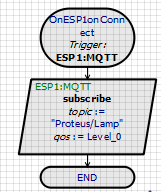
Almost all MQTT programs will have section of flowchart like this.
onMessage Event Handler
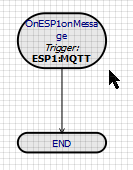
The onMessage event is called when a message is sent to a topic the client is subscribed to. This is where the three read methods (readMessage, readList and readTopic) come into play. They can only be used within this event as they directly relate to it.
setClientID Method
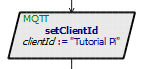
setClientID allows you to specify the name your device will receive and how it will be identified by the broker. You can also do this via the design time configuration properties.
Remember that each client needs to have a unique Client ID for the broker. If you have multiple devices with the same name, every time the new device with that name connects to the broker it will kick the old device with that name off. This can cause issues like loops as the old device attempts to reconnect. If you are planning to use multiple devices with one broker it is essential that each device has a unique clientID.
setWillMessage Method
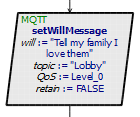
The will message is a publish method that is saved by the broker. This message will be saved by the broker however not sent. In the event that the client disconnects unexpectedly the broker will then remember and publish the will message.
In order to work the will message MUST be put before the connect method in your program.
For more on the workings of this function refer to Publish method.
connect Method
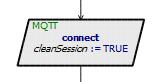
The connect method will connect the client to the MQTT broker. If there are old messages stored by the broker during the time the client was turned off, cleanSession = True will wipe them clean and delete them, whereas cleanSession = False will remember them. It will also remember old subscriptions from when it was last turned on.
disconnect Method
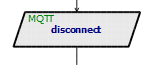
If you want to disconnect from the broker simply use the disconnect method.
subscribe Method
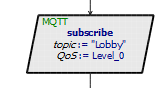
This method simply allows you to subscribe to a topic. Topics are case sensitive so be careful when typing. Topics can also be layered like a filing system. For example, Main/Lobby would be a two-layer topic. Main could contain multiple topics, for example Main/Hallway and Main/Kitchen.
If you want to subscribe to multiple topics easily you can do Main/# and it will subscribe to everything under it.
A wild card is were you can get all topics at the same layer with the same name. For example, if all those rooms had a /Temp topic. Main/Lobby/Temp, Main/Hallway/Temp and Main/Kitchen/Temp. To only subscribe to those Temp topics, you can do Main/+/Temp.
unsubscribe Method
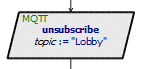
If you no longer wish to receive messages from a topic, use the unsubscribe method.
publish Method
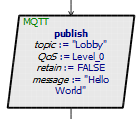
The publish method is how you send a message.
Topic refers to the topic in the broker you wish to publish the message to.
Retain is whether or not you wish the broker to remember the message. If this is set to true, then the message will be sent to every device new and old every time they connect and subscribe to that topic. Even if they have had the message before. You cannot clear retained messages so be careful.
Message is a list that lets you add multiple variables separated by a comma.

This message will look something like ““Hello World”,0” to the broker and any other clients.
readMessage Method
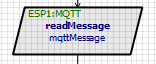
readMessage will simply return the whole message as a string. This can only be used inside the onMessage event handler.
If the incoming data is not a string it's better to use readList.
readList Method
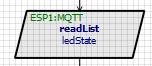
readList will split the message string by the commas. This can only be used inside the onMessage event handler.
For example, “Hello World”,1,True would become a list of three variables. A String, an Int and a Boolean. You as the user need to know in what order those variables are, create variables of the correct type and add them as a list to this function.

readList can easily be used with a list of 1 item. It's very useful if the incoming data is not a string as you can read into a variable of any type.
If you have the wrong variable type or your list is in the wrong order for the incoming data a program crash is quite likely.
readTopic Method
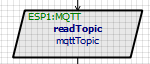
readTopic will return the topic that the message was sent to as a string. This can only be used inside the onMessage event handler.
You can also drag and drop a decision block from the MQTT peripheral directly. This allows you to quickly check to see if the topic on a message is the same as the one you enter
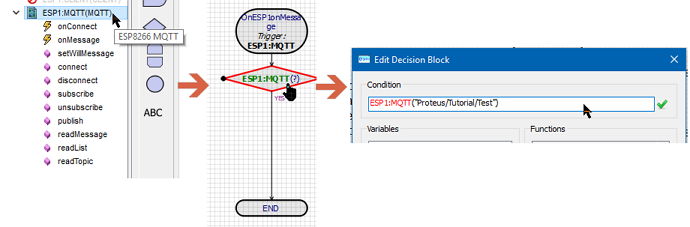
Since the reason for reading the topic is most often to perform different actions based on the topic this is often a really handy shortcut.
See Also:
MQTT Basics Tutorial (Subscribe)