IMPORT TUTORIAL
Introduction
The purpose of this short tutorial is to show you how to bring legacy Proteus VSM projects into a modern Proteus project. It is not intended as a functional tutorial on the use of Proteus during simulation or testing.
We will use an old (Proteus 7) PIC calculator design as our example but the steps in this tutorial would apply to any legacy Proteus VSM project.
Creating the VSM Studio Project
We need to bind the microcontroller on the schematic to our new firmware project. To do this, edit the processor part and then click on the Edit Firmware button on the resulting dialogue form.

Since we have no current project or firmware we will get a blank VSM Studio tab and a new firmware project wizard will appear to help us set up our project.
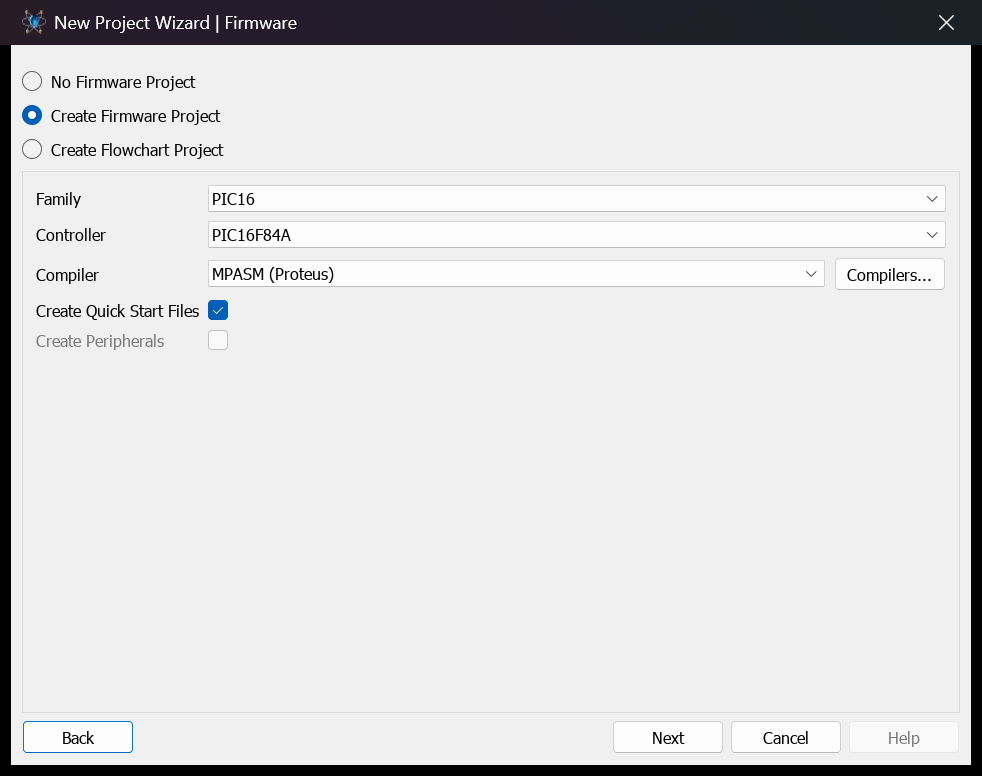
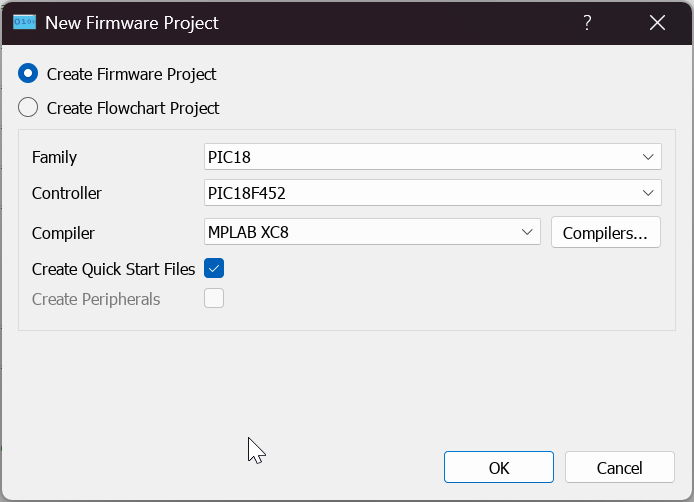
The processor family and processor variant will be auto-selected based on the micro-controller part on the schematic. We need to change the compiler field based on what we have installed and what was used to compile the program previously. In our case we used the MPLAB C8 compiler so we select that one.
See Also:
Compilers and Compiler Detection
Finally, the checkbox at the bottom of the wizard is used to create a skeleton template source file to help with getting started in writing firmware. This is very useful when starting a new project from scratch but since we are importing existing source code we don't need this and can de-select the option.

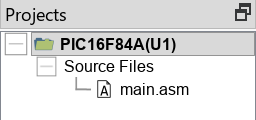
After exiting the dialogue form you should now see a project with the processor name in the project tree area of VSM Studio; our next step is to import our source to this project.
Importing the Source Files
Right click on the project name and select the 'Add Files' command from the resulting context menu (or launch from the Project menu).
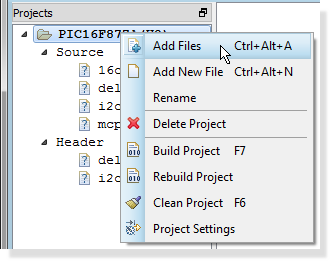
This opens a standard Windows file dialogue form from which you can navigate and select your old source files.
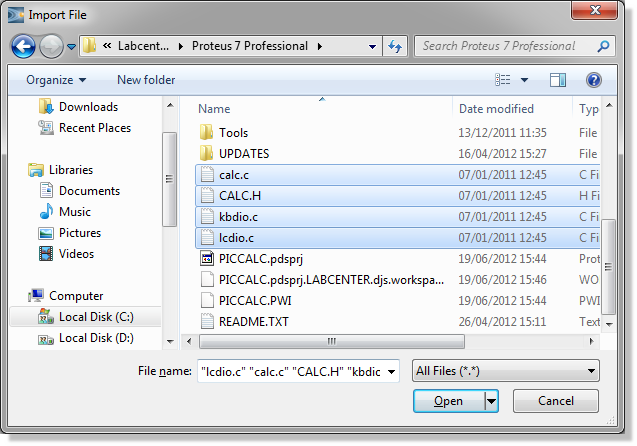
Holding the CTRL key down while clicking on files in this dialogue lets you select more than one file for import.
Repeat as necessary until all your source files have been imported. When you are finished all of our existing work is inside Proteus. Double clicking on a source file will open it in the Editing Window if changes are required.
Project Settings
In order to successfully compile the project we need to have the same option set as was used previously. In the majority of cases this is simply the default option set which is automatically configured for you by VSM Studio. However, it is not uncommon to have additional include directories or other project specific options which will need to be manually added to the project settings.
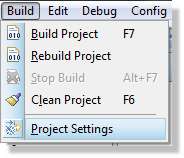
You can launch project settings by right clicking in the project tree, from the Project menu, or from the Project Settings button on the Build toolbar in VSM Studio.
The Embed Files checkbox on the Controller tab is worthy of further discussion.
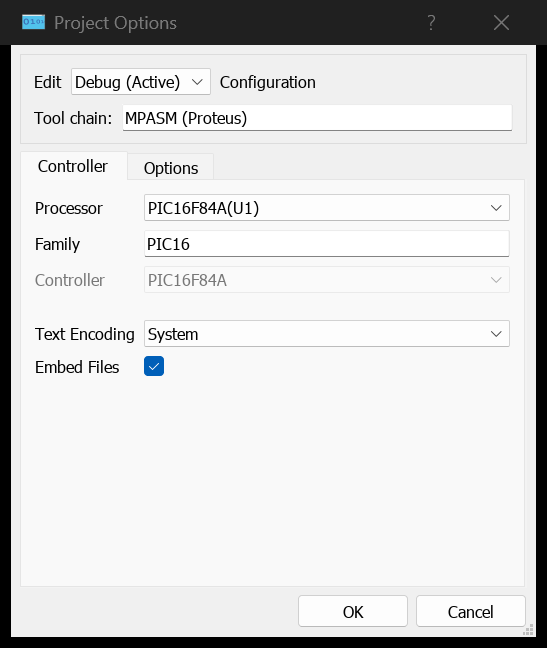
When this option is selected all source files are stored inside the main Proteus PDSPRJ file. A temporary session directory is used for compilation and simulation. This has the advantage that the Proteus project is portable and self-contained. If you turn this checkbox off then all of the source files will be deposited in the same directory as the main Proteus file. It then becomes your responsibility to organise and maintain relative/absolute paths to various files in the project.
Switching to the Options tab of the dialogue (which is titled Project Options) then allows you to set options for the compiler, assembler, linker and lib tools in your chosen toolchain.
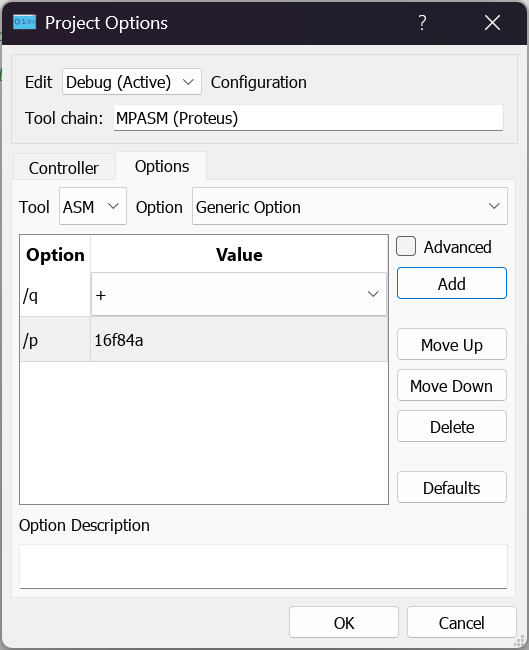
In our example, the default configuration is fine so no changes are required.
See Also :
Compile and Run
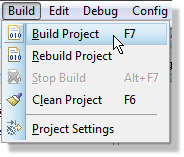
The last thing we need to do is build the source code and run a simulation. You can compile the project at any time using the CTRL+F7 shortcut key or via the build project command on the Build menu.
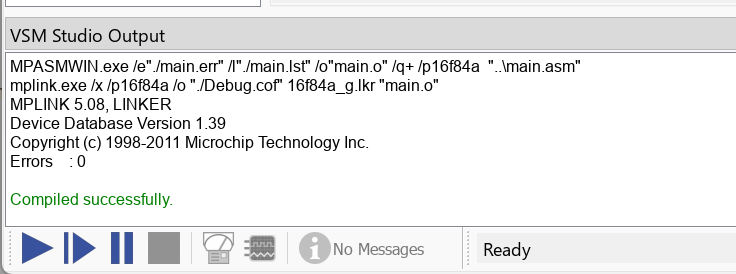
During the compile process, messages from the tool chain will be displayed in the Output Window at the bottom of the VSM Studio IDE and a 'compiled successfully' message is displayed if no problems are encountered.
A successful compile in VSM Studio automatically sends the firmware to the microcontroller part on the schematic ready for simulation. In order to run our program on our schematic all we need to do is press the play button on the animation control panel.
Debugging and testing is beyond the scope of this tutorial but is covered in brief in the new project tutorial and in full in the main Proteus VSM tutorial.