EDITING SKILLS
Overview
This topic explains how to interact with the flowchart editor. The focus here is on learning the skills needed to create a program — whether you're targeting Arduino, Raspberry Pi, or microPython-based hardware. Simulation and debugging are covered separately and we will link to more detailed topics where appropriate.
Navigation
To zoom in and out on the Editing Window
You can either:
1) Roll the middle mouse wheel in and out. This will zoom the Editing Window around the mouse position.
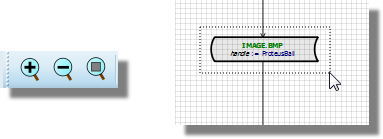
2) Use the zoom icons. This will zoom around the center of the Editing Window.
3) Press the F6 key to zoom in and the F7 key to zoom out. This will zoom the Editing Window around the current mouse position. The F8 key will reset the zoom levels to show the entire sheet.
4) Hold SHIFT key and left drag a box with the mouse. When you release, the Editing Window will zoom to the area drawn out by the box.
To pan across the sheet in the Editing Window
You can either :
1) Roll the middle mouse wheel backwards (Zoom out), move the mouse to desired place and roll the middle mouse wheel forwards to zoom in.
2) Hold the SHIFT key down and bump the mouse against the side of the Editing Window. This will pan the sheet across the Editing Window.
To switch between sheets in the Editing Window
You can either:
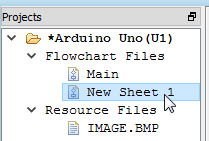
1) Click on the sheet that you want on the small tabholder directly above the main Editing Window display.
2) Double click on the sheet that you want in the project tree.
Placing, Selecting and Deleting Blocks
To place a flowchart block
Peripheral Operation Blocks:
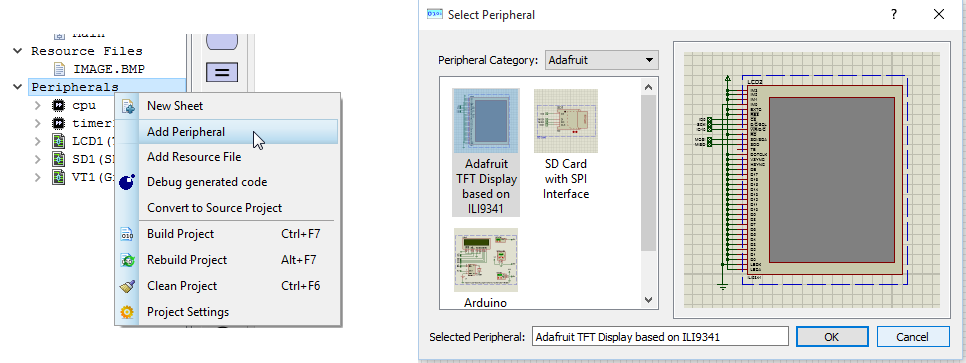
Add the peripheral via the right click context menu on the Project Tree and then drag and drop the method onto the Editing Window.
Storage Block Types
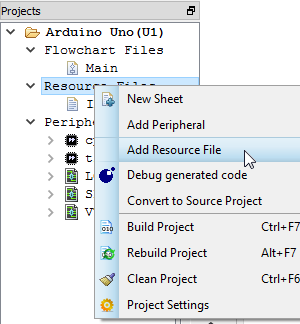
Add the resource via the right click context menu on the Project Tree and then drag and drop onto the Editing Window
Any block type:
Drag and drop from the appropriate flowchart icon across into the Editing Window.
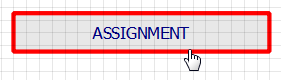
To select a flowchart block
Left click the mouse on the block.
To select multiple flowchart blocks
You can either:
1) Drag a box with the left mouse button over the blocks you want to select.
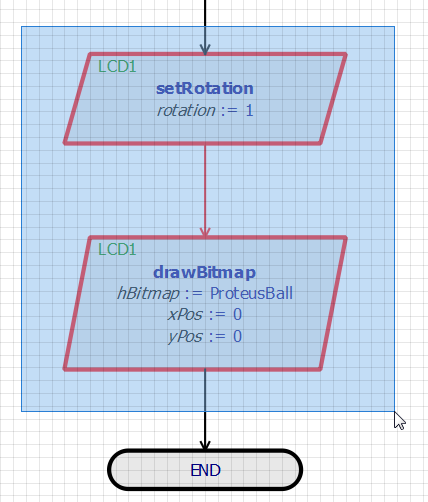
2) Hold SHIFT key down and left click on blocks individually.
Note that many actions are specific to a single flowchart object (e.g Edit). So, while you can for example move selected objects as a group, you will be prevented from performing other block operations.
To delete a flowchart block
You can either:
1) Right click on the block and select delete from the resulting context menu.
2) Left click to select the flowchart block and press the delete key on the keyboard.
To delete multiple flowchart blocks
Select the blocks to delete and then press the delete button on the keyboard to remove them.
Attaching, Moving and Detaching Blocks
To move an unconnected block
Select the block by left clicking and then drag the block.
To move a connected block
Select and then drag the block. This will bump the adjacent block in the direction of motion and result in a concertina affect. This is an important technique because it is the method you use to make space on a flowchart for inserting a block.
You can quickly 'tidy' a flowchart vertically by moving the top or bottom blocks to make the spacing between all of the blocks the same.
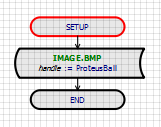
To move a series of connected blocks
If the set of blocks you want to move includes both a start and end block then you can simply drag a box around it and move it to a better place on the sheet.
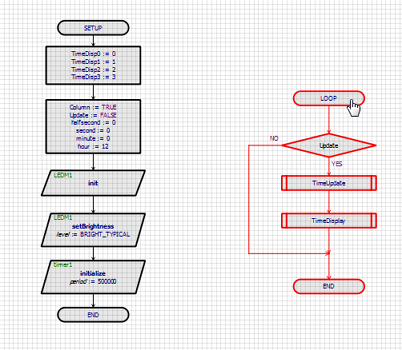
Block move of an entire routine
If you want to move the routine onto a different sheet you can use the clipboard cut and paste across the two sheets.
If you want to move a series of connected blocks that form part of a routine, but not the full routine, then you must either:
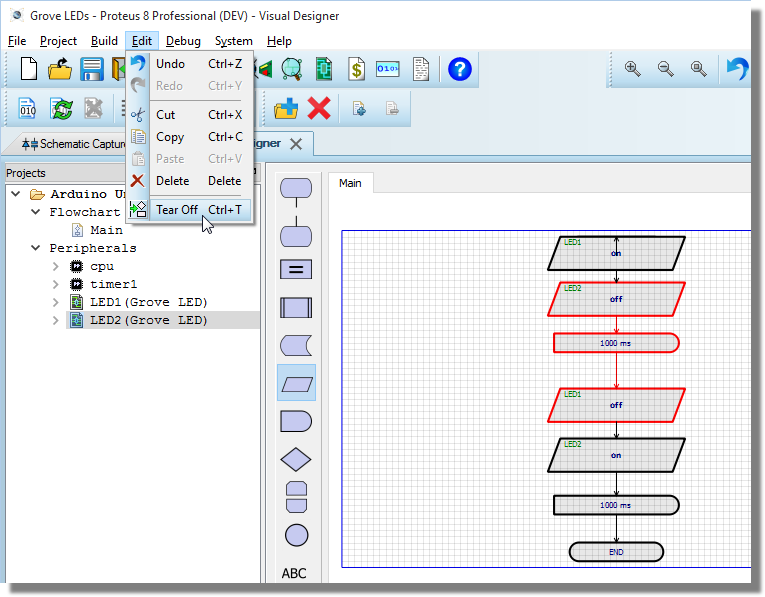
1) Tear off the series of blocks and move them elsewhere.
2) Move them in the context of the current routine.
- If you move vertically this will bump other blocks closer together but it will not allow you to change the position of the selected blocks in the flowchart.
- If you move horizontally it will move the entire routine horizontally.
Also, it can lead to some very strange looking charts !
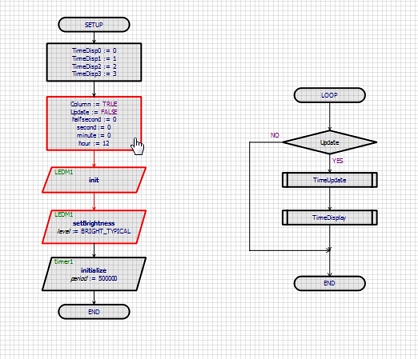
Block Move of part of a routine.
To attach a block to a flowchart
When you want to insert a block you do so by dragging and dropping. As you drag the flowchart block you will see connection nodes appear when the block is correctly positioned over the wire. Releasing at this point will connect the block to the flowchart.

Connection Nodes tell you when to release the mouse - this will auto-connect the block to the chart
You can do this as you initially place the block or by selecting a block that is placed but unattached.
Note that some block can only be connected at top and bottom (e.g. delay block) while others also allow sideways entry (e.g. assignment block).
If you are inserting a block you may need to first make some space. You can do this easily by dragging one of the blocks in the flowchart up or down to clear an area for the new block to go.
To detach a block from a flowchart
You can detach or tear off a block from a flowchart by either:
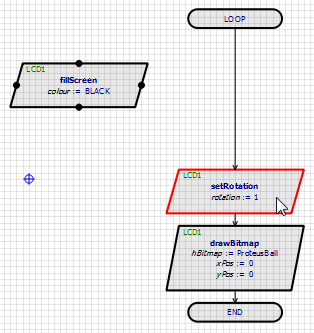
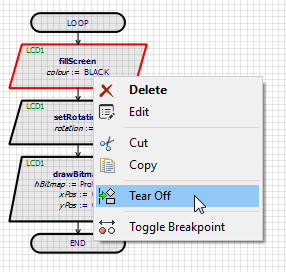
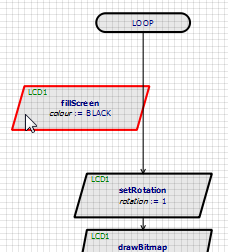
1) Right click on the block and select tear off from the resulting context menu. This will detach the block and leave it slightly to the side for re-positioning.
2) Select the block and hold the CTRL button down as you move the block away. This will tear the block from the current chart and you can then re-position as required.
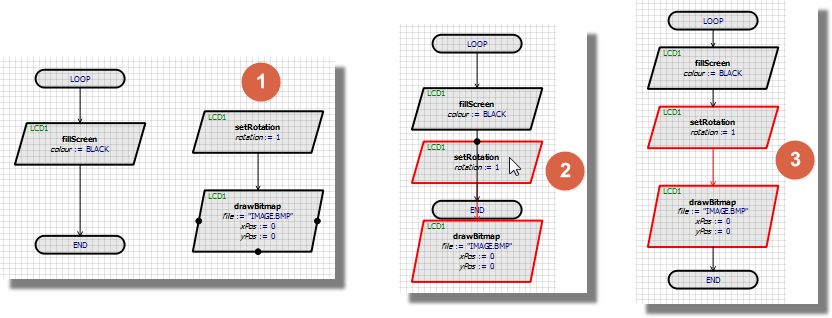
To attach a series of flowchart blocks
1) Make some room at the place in the chart you want to insert.
2) Select the series of 'connected' blocks you want to insert.
3) Move them into place, watching the top connection nodes of the uppermost block. When this appears, check that the bottom connection node is also visible.
4) Release the mouse to insert.
To detach a series of flowchart blocks
1) Select the series of blocks you want to insert.
2) Hold the CTRL button down and drag the blocks off the flowchart or use the tear off command on the Edit Menu.
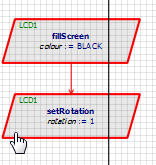
Commands on the context menu apply to a single block whereas commands on the Edit menu apply to all selected blocks. This is an important distinction as some commands (e.g. Edit) are meaningless for multiple blocks.
Editing a Block
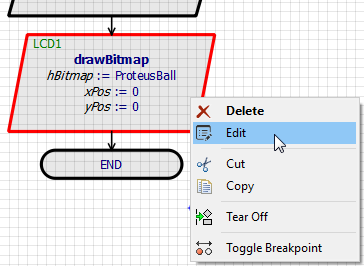
To edit a block you can either right click and select Edit from the resulting context menu or you can double click on the block.
Regardless of the type of block you are editing you are almost certain to want to enter an expression to give the block meaning. In some cases such as calling a subroutine this will be extremely simple but for other block types it can be a little more complex. Fortunately, Visual Designer can help in several different ways:
Variable and Function Listing
Where appropriate, all current variables are displayed in the bottom left of the dialogue form and standard library functions are displayed in the bottom right of the dialogue form. Double clicking on variable/function will add it to the current expression.
You can easily create, edit and remove variables via the buttons at the bottom of the variables display.
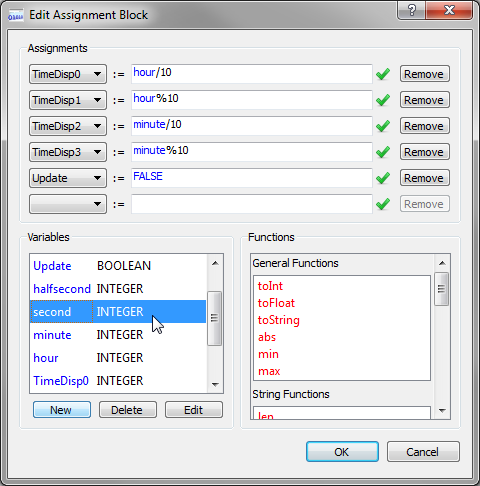
Multiple Expression Assignments using Variables
Combo-boxes will be used to restrict selection to variables of the correct type where possible. For example, the loop variable in a For-Next loop must be of type INTEGER.
Auto Complete
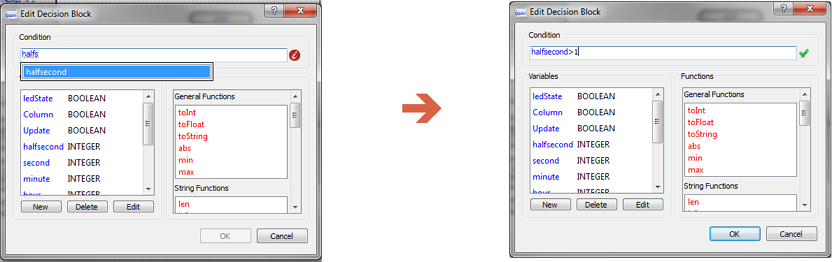
The auto-complete system will both prompt you with function hinting during entry and also automatically complete named variables when typing. Press TAB or ENTER to auto-complete.
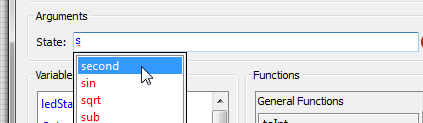
Auto-completion
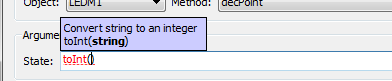
Function hinting
Syntax and Type Checking
Comprehensive syntax and type checking takes place as you enter the expression. The expression status is indicated at the right hand side and clicking on the red info icon will provide detail on any errors in the expression.
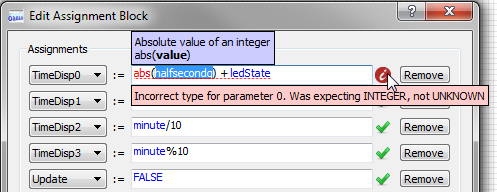
Get more information on incorrect expressions.
Refer to specifics on individual block types for more detailed information.
See Also:
Wiring blocks together
Blocks are connected together with flowlines and Visual Designer provides an point-to-point router to help with the task. The golden rule is that you must connect from an output to an input.
To join blocks together with a flowline
1) Click on the output connection node.
2) Move the mouse to the destination (input) connection node.
3) Click to complete the flowline.
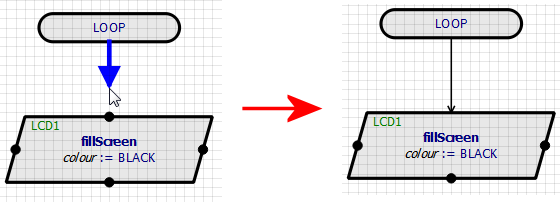
It's good practise to connect flowlines from top downwards to bottom because it makes loops much clearer. Try to avoid connecting from bottom to top in normal flow.
To adjust / move a placed flowline
1) Click to select the flowline.
2) The mouse cursor will change to show you the available direction of movement.
3) Left drag with the mouse to drag.
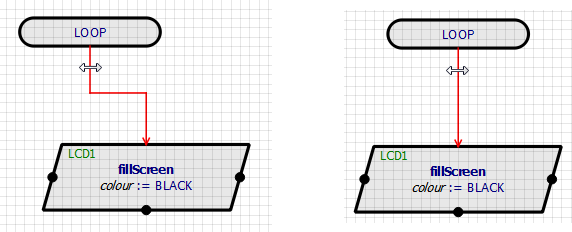
To delete a flowline
1) Right click on the flowline and select the delete option from the context menu.
Splitting the flowchart into columns
If the flowchart is getting to the bottom of the page inside a single routine you may need to split the flow with interconnect blocks.
1) Right click on the flowline near the bottom of the page and select split from the resulting context menu.
2) Block Move the bottom portion up to the top of the page at the right hand side.
3) Make some space.
4) Continue inserting blocks.
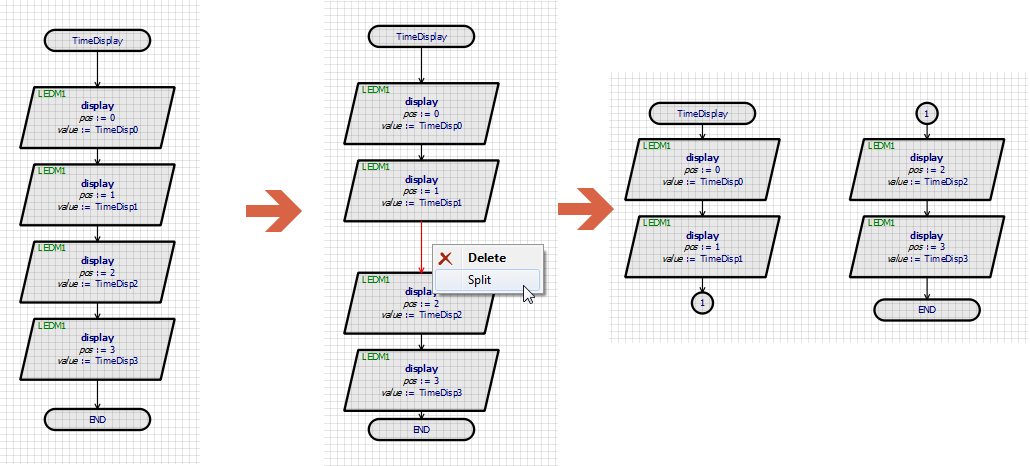
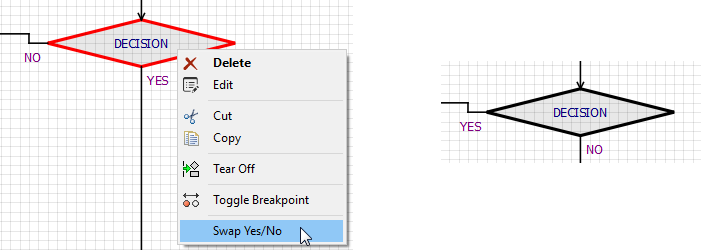
To change the flow of decision blocks
1) Place two flowlines corresponding to the output paths of the decision.
2) If the YES and NO paths are the wrong way around, right click on the decision and swap them.
Clipboard Commands
Clipboard commands in Visual Designer work in exactly the same way as other Windows applications and can by invoked in the normal way.
- CTRL+X : Cut to Clipboard.
- CTRL+C : Copy to Clipboard.
- CTRL+V : Paste from Clipboard.
- Menu Icons.
- Commands on Edit Menu.
The most common use for the clipboard in Visual Designer is for organizing flowchart routines in the Editing Window and, in particular, for moving routines between sheets.
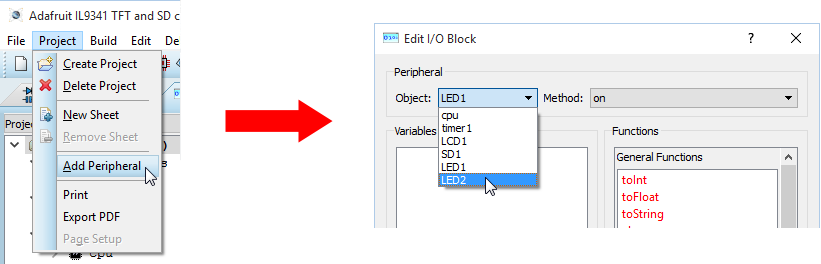
Remember when copying and pasting that you may be pasting blocks that include peripherals (e.g. hardware shields). In this case the paste will duplicate the flowchart blocks and assignments but will not create new hardware on the schematic. If that is what you want to do, you need to add a peripheral, edit the relevant pasted blocks and assign the method to the correct hardware.
Adding, Using and Removing Peripherals
To add a peripheral device
1) Right click on Project Tree and select Add Peripheral from the resulting context menu.
2) Select the shield or Grove peripheral from the Browser.
3) If you are using Grove peripherals you may need to switch to the schematic module, double click on the label and change the connector to a unique ID.
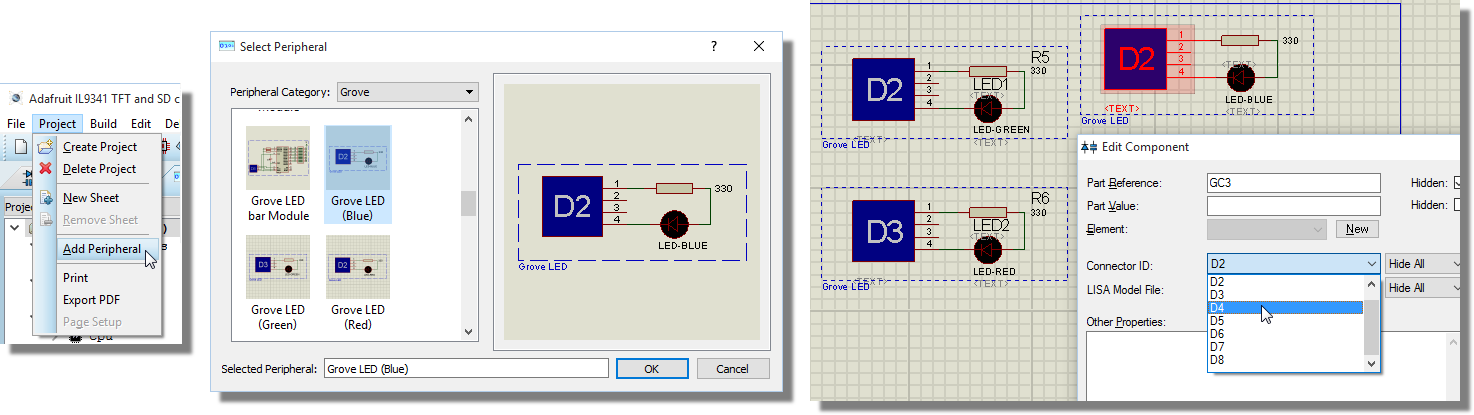
With Arduino, it is quite easy to add shields that are incompatible with each other. For example, if two shields use the same CPU timer, the program is unlikely to work. You need to check this compatibility yourself as Visual Designer does not interfere with the Arduino drivers.
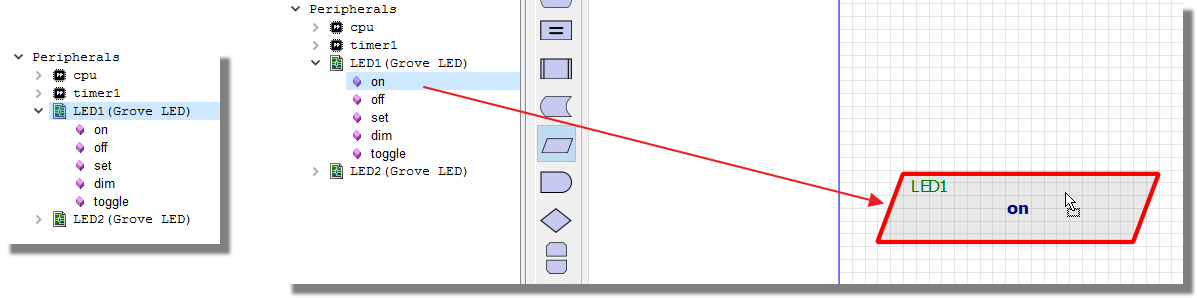
To use a peripheral device
1) Expand the menu in the Project tree to access the methods of the peripheral.
2) Drag and drop the method onto the flowchart.
To remove a peripheral device
1) Right click on the peripheral in the Project tree and select Remove Peripheral from the context menu..
2) Confirm from the resulting dialogue box.
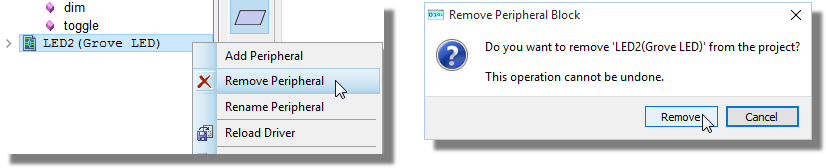
If you remove a peripheral device, it will not remove any flowblocks that referenced the device. You need to adjust or delete all such blocks manually.
See Also:
Adding, Using and Removing Variables
Variables are created and manipulated inside the object editing dialogue forms and are always global to the project. The following types are supported:
- Boolean (TRUE / FALSE)
- Integer (Integer number)
- Float (Floating point number)
- String (String of characters)
- Handle (Handle to a resource).
The expression editor will type-check assignments automatically.
To create a new variable
1) Edit the block you are working on.
2) At the bottom left, use the New button to launch the Create Variable dialogue.
3) Enter the name of the variable and assign it a type.
4) Click OK to exit the dialogue.
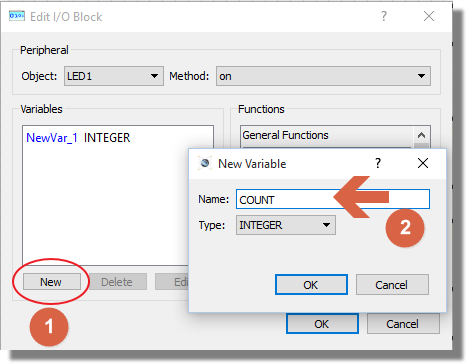
1, Click New. 2, Set the Variable and click OK.
To use an existing variable
Edit the block you are working on and then either:
1) Use the variable drop down to select the variable.
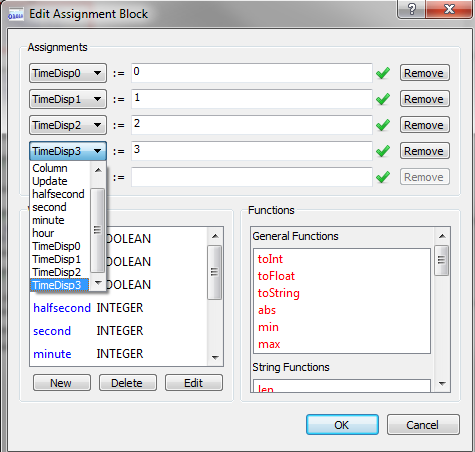
2) Type the variable name and use the auto-complete.
3) Double click the variable name from the list to insert into the expression.
To edit a variable
1) Edit one of the blocks on the flowchart.
2) Select the variable from the list on the left hand side.
3) Click the edit button and change the name and/or type of the variable.
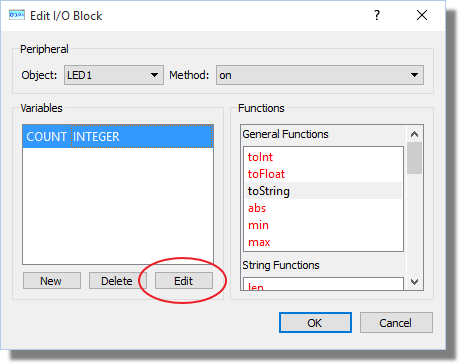
To remove a variable
1) Edit one of the blocks on the flowchart.
2) Select the variable from the list on the left hand side.
3) Click delete to remove the variable
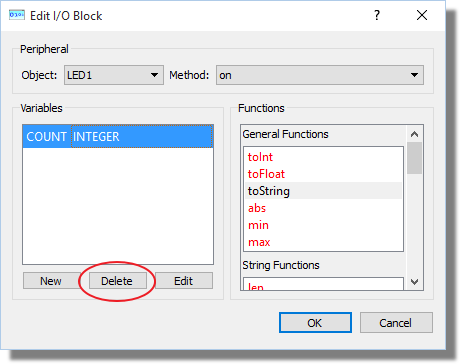
If you edit or remove a variable you need to remember to check and change all the other flowchart blocks in which the variable has been used.
See Also: