Traces
Trace Styles
There is just one type of trace. The available trace styles are displayed when the Trace icon is selected, and you can edit any of the styles by highlighting its name and clicking the Edit button.
Trace styles have a single attribute which defines their width.
New trace styles can be created using the New Trace Style command on the Library menu.
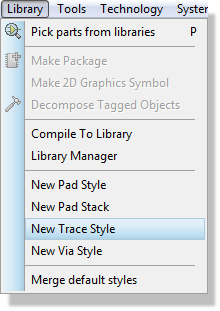
Creating a new trace style.
You can only create new styles while the layout is unlocked. The layout is locked whenever it is out of sync with the schematic, and in that state every command that would modify the layout is disabled, not just the New Style commands. If the command is greyed out you need to either disable live netlisting or synchronise with the schematic.
When you start placing a route the trace style chosen is the one specified in the net class tab of the design rule manager. Similarly, when you neck down to a thinner track style (SHIFT+N during routing) to connect to a thin pad, the necking style in design rule manager is chosen automatically. It is worth setting this up before you start routing, so that manual route placement behaves consistently.
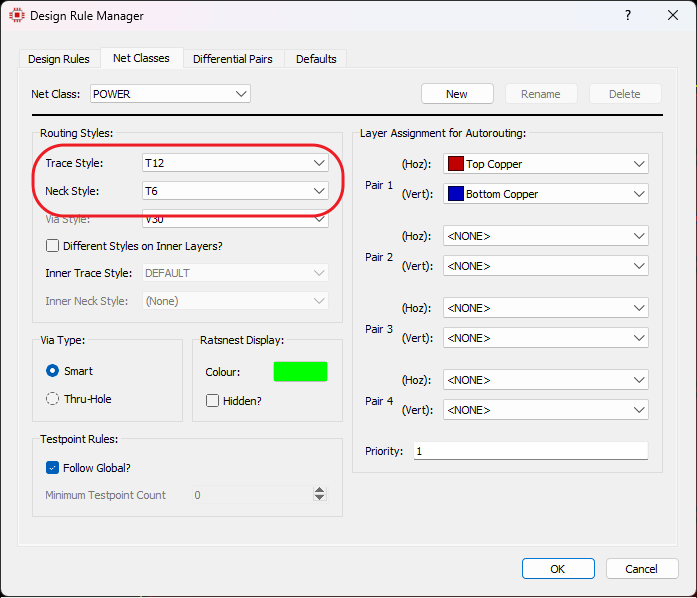
Setting Trace and Neck Styles for routes in a net class.
It follows that you can, and should, define net classes for signals on the board needing special attention. Notably, those which cannot be routed using the standard SIGNAL net class or the single supplied POWER net class.
Net class configuration also allows you to set different conductor widths on the inner layers than the outer layers of the board.
Differential pairs carry their own styles, configured per net class in the design rule manager rather than through the trace style list. See Differential Pairs for the pair width and gap settings.
While Auto Trace Style Selection is enabled, the style you highlight in the object selector has no effect on route placement: the style is taken from the net class instead. Turn Auto Trace Style Selection off (Ctrl+T) if you want the selector to govern the width of the next route.
See Also: