Most PCB Design software packages have included auto-placement tools for many years now. The user runs the auto-placer and all of the footprints get dumped inside the board edge, normally using some basic bin packing algorithm. This can be helpful in many ways as you don’t have to manually place all the parts yourself but it can actually make things harder as you hunt for the right bypass capacitor to move alongside your logic device.
Human interaction with part placement and positioning is always going to be necessary but the floor planning feature is really easy to set up and can make life a lot easier. It can also help you think about thermal management, function, and electrical noise considerations early in the layout process.
Placement Rooms
Normally, we start by drawing the placement rooms on the empty layout. These are just named areas drawn on the layout to indicate that specific circuitry is to be placed inside the area.
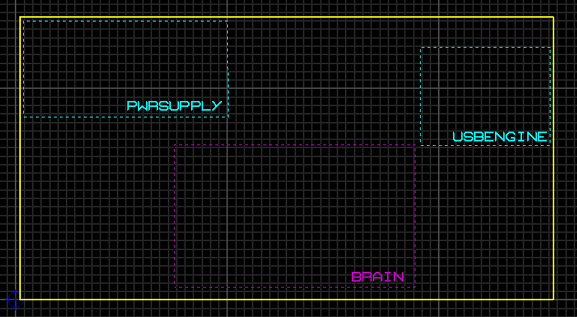 Example floorplan showing defined areas for placement.
Component Groups
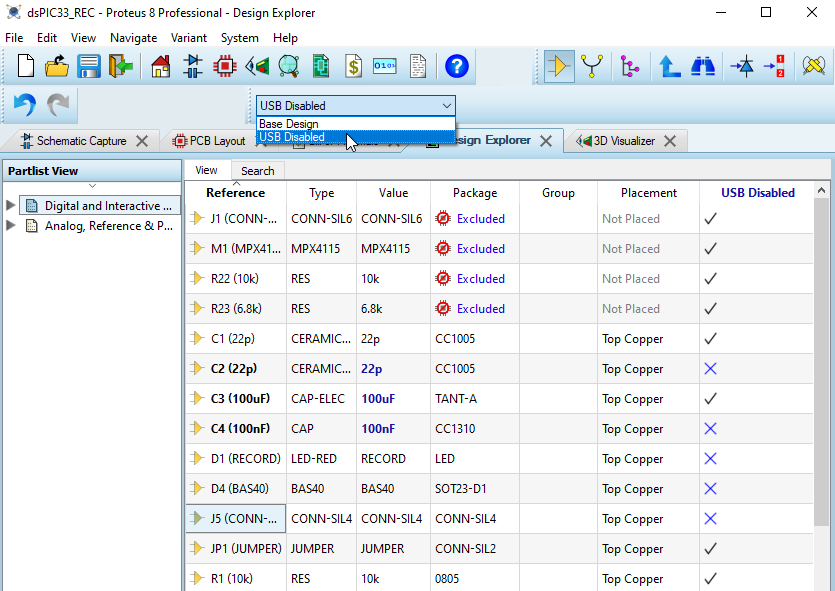
Next, we tell the software which circuitry belongs to which placement room. This is done by assigning the group property of circuitry with the name of the placement room. In the Proteus Design Suite this is normally done in editor view of the Design Explorer.
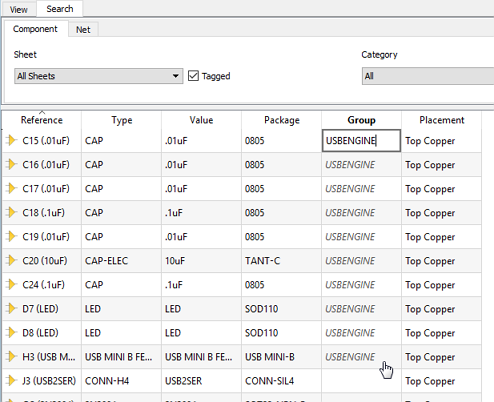 Assigning the USBENGINE group property by typing once and then dragging the mouse.
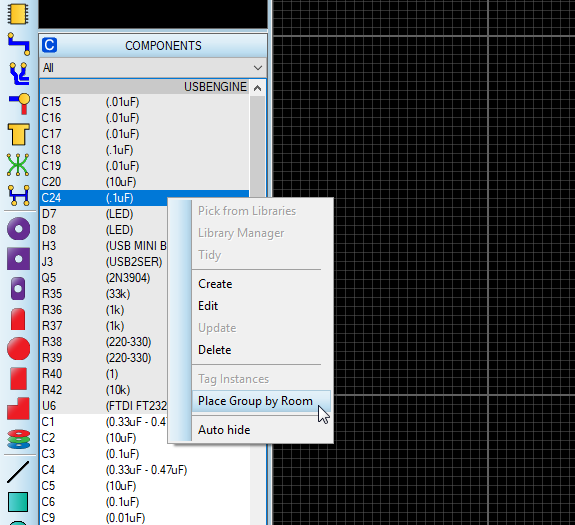
All that’s left is to run the auto-placer. This can be done globally or directly from the parts bin and will dutifully place all the component group parts into the room with the same name and on the correct side of the PCB.
Once you’ve finished with placement you are free to remove the placement room definitions on the layout. You’ll still not find that bypass capacitor in the right place but at least now it will be in the same area of the PCB as its accompanying logic device.
So, the next time you’re about to start your PCB layout why not try floor planning first and see if you find it helpful. To find out more about how this works in the Proteus Design Suite you can watch the video linked below…
All content Copyright Labcenter Electronics Ltd. 2026. Please acknowledge Labcenter copyright on any translation and provide a link to the source content on www.labcenter.com with any usage.Get our articles in your inbox
Never miss a blog article with our mailchimp emails